10 DIY Cardboard Wall Decor Cheap
Creating stylish and eye catching wall decor does not always require expensive materials or elaborate tools. Cardboard, an item most homes already have in surplus, is one of the most versatile and budget friendly materials for home decoration. It is light, easy to cut, simple to paint, and highly adaptable for multiple design styles. Whether you prefer minimal modern aesthetics, warm rustic accents, geometric patterns, or artistic textures, cardboard can be transformed into impressive wall pieces that look high end while costing almost nothing. This detailed guide explores ten carefully selected cardboard wall decor ideas that are cheap, easy to craft, and ideal for beginners or experienced DIY enthusiasts. Each idea includes preparation tips, required materials, and clear explanations so you can confidently complete each project. By the end of this guide, you will have numerous creative options to elevate your living space without overspending.

1. Cardboard 3D Geometric Wall Panels
Creating three dimensional geometric wall panels using cardboard is one of the most effective ways to add depth and style to a plain wall. This idea works well in living rooms, hallways, entryways, or behind a desk setup. The preparation involves collecting sturdy cardboard sheets, ensuring they are smooth and free of dents. You will also need a ruler, pencil, cutter, glue, and paint of your choice. Begin by drawing repeating geometric shapes such as triangles, hexagons, or diamonds. Cut each shape neatly and fold edges slightly to create raised angles that enhance the three dimensional appearance. Assemble the shapes into a cohesive pattern on a flat surface and glue them securely onto a cardboard backing sheet. Once the arrangement is complete, paint the entire panel using a single color for a modern minimalist look or combine multiple shades for a more vibrant design. The result is a stylish wall feature that resembles expensive decorative panels often seen in interior design magazines. Despite its sophisticated appearance, the project remains simple and budget friendly because cardboard is lightweight and easy to manipulate. When mounted on the wall, the shadows created by the geometric folds add dynamic texture and make the space feel more artistic and curated.

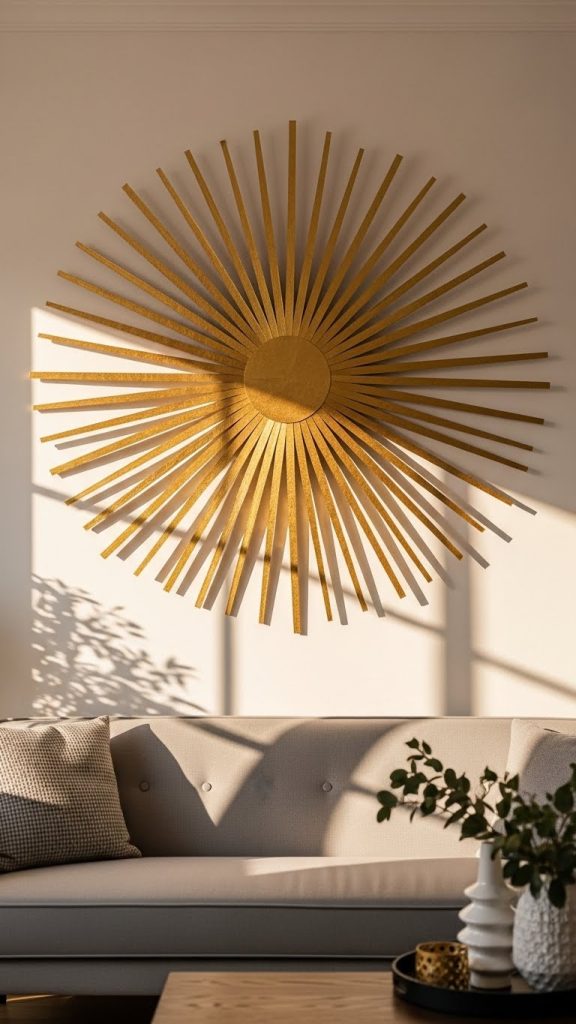
2. Cardboard Sunburst Wall Art
A sunburst wall art piece can instantly bring warmth and visual balance to any space, especially above a sofa, bed, or console table. To prepare for this project, gather cardboard, a circular base cut from the cardboard, scissors, glue, and optional metallic paint. Start by cutting long strips or triangular rays from the cardboard. The rays can be symmetrical for a clean look or varying lengths for a more organic feel. Secure the rays around the circular base using hot glue or strong craft glue, ensuring the arrangement stays evenly spaced. Once the primary layer is complete, add a second or third layer of rays on top to enhance dimension and depth. Painting the finished piece in gold, bronze, or white can create a high end appearance reminiscent of classic sunburst mirrors found in luxury decor stores. Although the design looks intricate, the construction is simple since cardboard is easy to shape and glue. This project is ideal for anyone seeking a focal point that brings brightness and movement to a room. Furthermore, the lightweight nature of cardboard makes installation stress free and safe. This DIY sunburst decor demonstrates how basic recyclable materials can become stunning artistic features with the right creative approach.
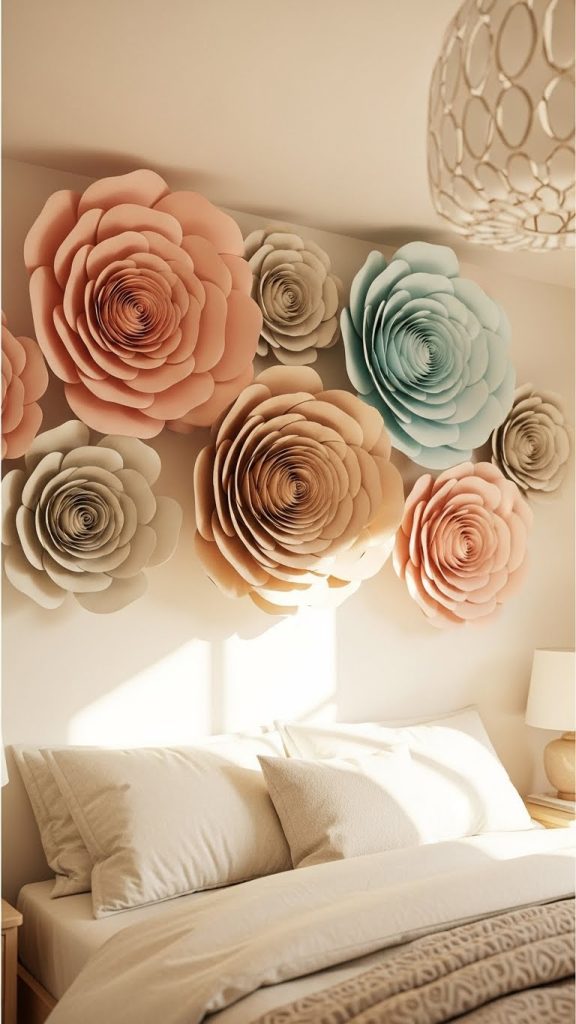
3. Layered Cardboard Flower Wall Decor
For those who prefer soft and elegant designs, layered cardboard flowers offer a charming wall decor option. Begin by preparing several sheets of cardboard, a pencil, cutting tool, glue, and paint. Draw petal shapes in different sizes to create depth when layered. Cut multiple pieces of each petal shape and gently curve the edges by rolling them over a pencil. This simple step adds realistic dimension and prevents the flowers from appearing flat. Assemble the flowers by gluing larger petals at the bottom and gradually adding smaller ones toward the center. You can create a single large statement flower or several medium sized ones arranged into a bouquet style composition. Paint the flowers in pastel tones for a soft aesthetic or bold colors for a more dramatic effect. This type of decor works wonderfully in bedrooms, nurseries, or reading corners where a touch of softness enhances the ambiance. Cardboard is an excellent material for this project because it holds shape well while remaining easy to manipulate into curved forms. The finished flowers give the appearance of handmade paper sculptures often sold in boutique home decor stores. With patience and attention to layering, this project produces elegant results without requiring expensive supplies.
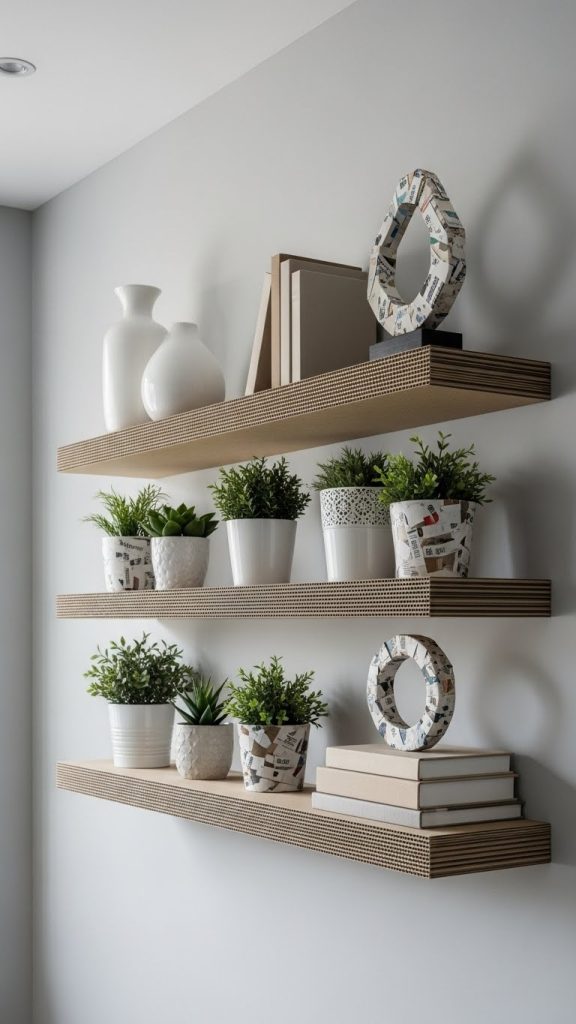
4. Cardboard Wall Shelves for Lightweight Display
Cardboard wall shelves may sound unusual, but with the right construction method they can become sturdy enough to hold lightweight decorative items. Preparing for this project requires thick corrugated cardboard, measuring tape, a cutter, glue, and optional paint or contact paper. Start by cutting several identical pieces for the base of the shelf. Glue them together to create a reinforced layered core capable of supporting small objects such as candles, mini planters, or framed photos. Next, cut side panels and front edge pieces to cover the layered base, giving the shelf a clean finished look. The shelf can be painted or wrapped in contact paper to mimic wood or marble textures. Secure the shelf to the wall using double sided adhesive suitable for light loads or removable hooks with a flat surface. This project is ideal for renters because it offers affordable decor solutions without damaging walls. Cardboard shelves are especially useful in workspaces, craft rooms, or small bedrooms where you want functional yet stylish organization. The key advantage of this project is its adaptability. You can customize the shelf shape, length, or color to match your decor style. Despite its simplicity, this DIY idea delivers both utility and visual appeal on a minimal budget.
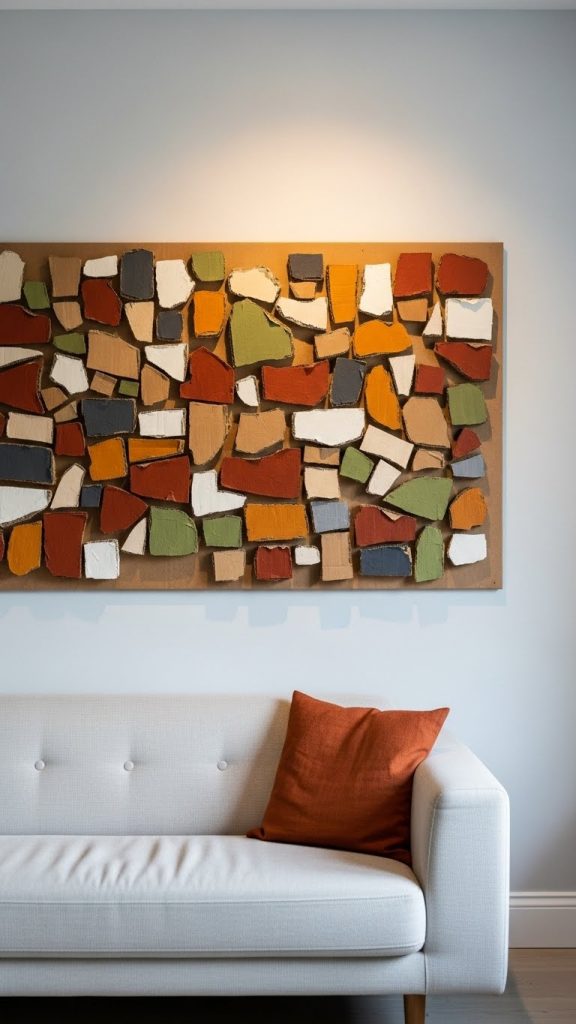
5. Cardboard Wall Mosaic Art
Mosaic art often looks expensive and detailed, but cardboard allows you to recreate the same effect at a fraction of the cost. Begin by collecting cardboard sheets, cutting them into small squares or irregular shapes. You will also need glue and paint. Prepare a large backing board from cardboard and sketch a simple outline of your desired mosaic design. This could be geometric, abstract, or inspired by nature. Arrange the small cardboard pieces within the outline, leaving slight gaps between pieces to mimic authentic mosaic spacing. Glue each piece carefully to maintain alignment. Once the mosaic base is complete, paint the pieces individually or apply a wash of coordinated colors to bring the design to life. The texture of the cardboard adds depth that traditional flat paintings may lack. This project encourages creativity because you can combine colors, shapes, and patterns freely. The final result becomes a unique wall statement suitable for living rooms, hallways, or office spaces. Cardboard mosaic art is not only affordable but also relaxing to create because the repetitive placement of pieces provides a meditative crafting experience. This project demonstrates how simple materials can transform into meaningful artwork with thought and patience.
6. Cardboard Faux Window Frame Wall Decor
Creating a faux window frame from cardboard can dramatically change the feel of a room by giving it an open and airy appearance. Preparation involves measuring the desired window size and gathering cardboard, a ruler, cutter, glue, and paint. Begin by cutting long rectangular pieces for the frame and inner dividers. Glue the pieces together to form the window grid. To increase strength, double layer the cardboard frame by gluing two identical cutouts together. Once the frame structure is complete, paint it with white or wooden tones depending on your preferred style. You can also add a printed scenic background behind the frame or leave the space open for a minimalist look. The faux window can be further enhanced by adding curtains made from scrap fabric for a cozy touch. This decor idea is especially beneficial for small rooms or areas with limited natural light because it creates an illusion of openness. The cardboard frame is lightweight, making installation simple and damage free. This project showcases the versatility of cardboard by demonstrating how it can replicate architectural features convincingly. With careful measurement and clean cutting, the faux window becomes a charming decorative element that makes the room feel brighter and more inviting.

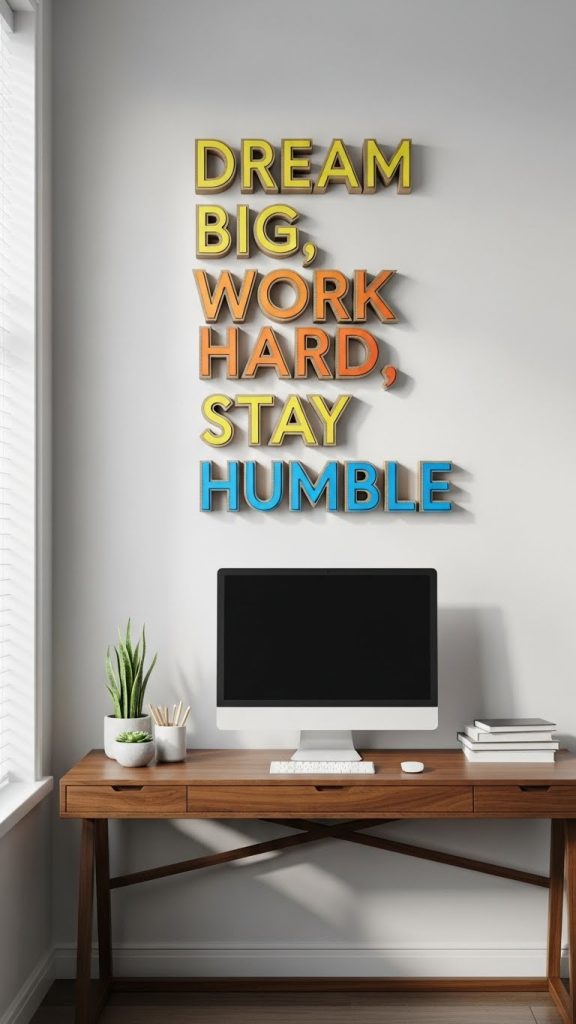
7. Cardboard Quote Wall Art
Cardboard quote wall art is perfect for adding personal meaning and inspiring messages to your home. Preparation begins with choosing a quote that resonates with you. Gather cardboard, a cutting tool, pencil, glue, and paint. Start by writing or printing the quote in your preferred font. Place the paper over cardboard and trace the outlines. Carefully cut out each letter, ensuring smooth edges. For added thickness, you can stack multiple cutouts of each letter and glue them together. Once assembled, paint the letters in a solid color or use multiple tones to create a gradient effect. Mount the letters directly on the wall or glue them onto a cardboard backing panel for easier installation. This decor idea works well in entryways, home offices, bedrooms, or study areas where motivational words can uplift the space. Cardboard is ideal for this project due to its ease of cutting and lightweight nature. The finished piece resembles custom wooden or acrylic lettering sold at decor shops but costs virtually nothing. It also allows for full personalization since you can select the size, style, and message. This project combines creativity with self expression, creating meaningful decor that reflects your personality.
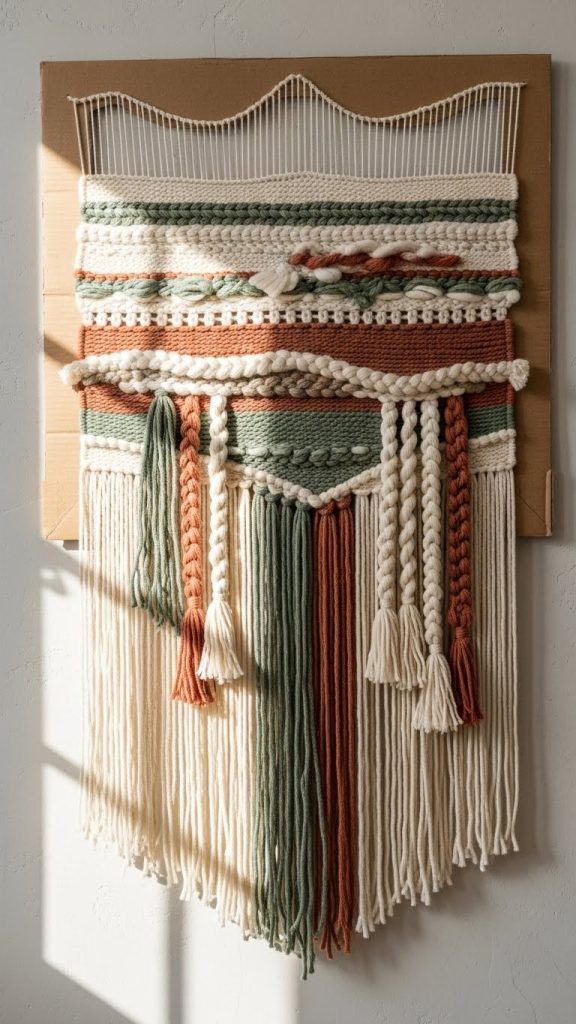
8. Cardboard Woven Wall Hanging
A woven wall hanging made from cardboard is an excellent option for those who appreciate textured artisan style decor. Preparation involves cutting cardboard strips, gathering yarn or fabric scraps, glue, and scissors. Begin by creating a large rectangular frame from cardboard. Cut inner slits along the top and bottom edges of the frame. These slits will hold the warp strings in place. String yarn vertically through the slits and secure them tightly. Begin weaving horizontal strips of cardboard or fabric through the vertical strands. Alternate the pattern to create a traditional over and under weave. You can enhance the design by incorporating textured materials such as braided yarn or frayed fabric pieces. Once the weaving is complete, glue the ends securely and trim any excess. The final wall hanging can be left natural or painted for additional color. This craft works beautifully above sofas, desks, or beds, adding warmth and softness to the overall decor. Cardboard acts as a sturdy weaving frame while also serving as part of the design. This project highlights how simple materials can replicate trendy woven wall decor often sold at premium prices. It offers a creative and budget friendly way to bring artisanal texture into your home.
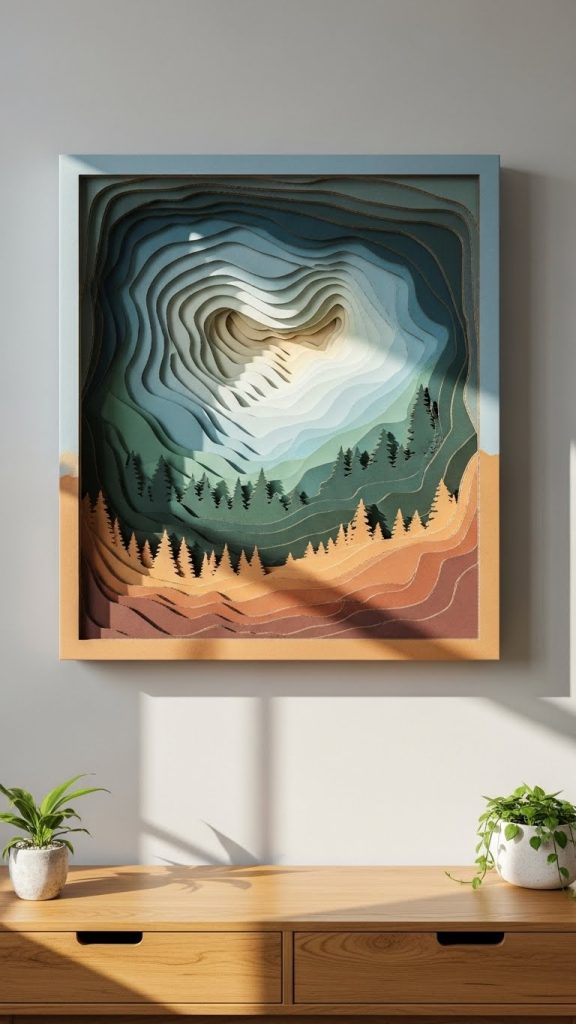
9. Cardboard Layered Landscape Art
Layered landscape art made from cardboard creates a stunning dimensional effect that resembles paper cut scenery. Prepare different shades of cardboard or use paint to create color variations. Sketch simple mountain ranges, hills, or trees on separate pieces of cardboard and cut them out carefully. Layer the pieces by placing the background shapes at the bottom and stacking the foreground pieces above using glue or small cardboard spacers. This technique creates depth similar to shadow box artwork. You can frame the piece using additional cardboard strips to give it a finished appearance. This decor is ideal for living rooms, reading corners, and cozy spaces because the layered effect generates a calm and artistic atmosphere. Cardboard is perfect for this project because it holds shape well and provides subtle thickness for layering. Painting the layers in soft gradients enhances the visual appeal even further. With a simple design and thoughtful assembly, you can achieve a high quality artwork that looks professionally crafted. This project encourages creativity because you can adapt the landscape to match any theme, whether minimalist, vibrant, or nature inspired.
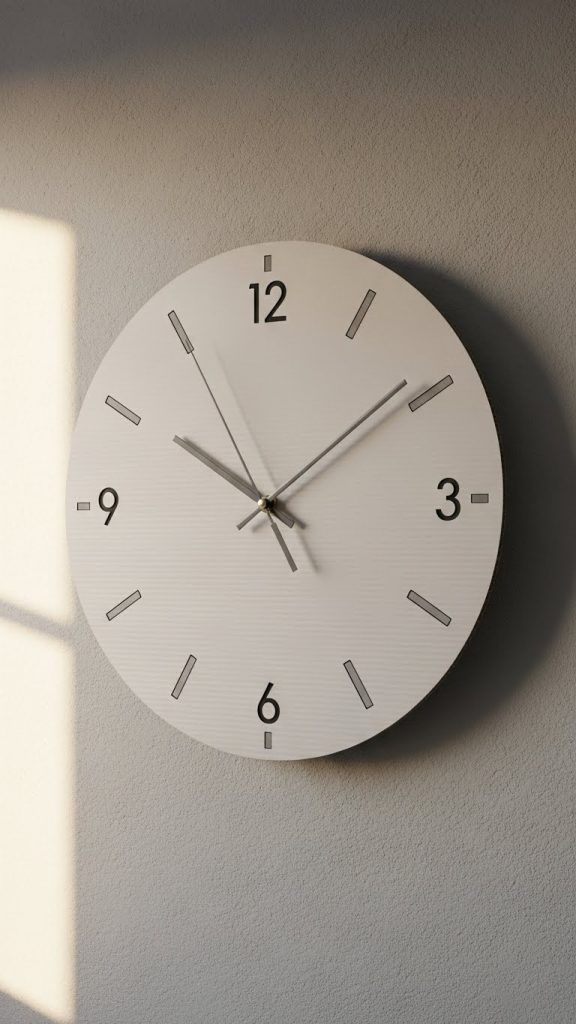
10. Cardboard Wall Clock Decor
A cardboard wall clock is an impressive functional decor project that requires minimal cost and basic materials. Begin by cutting a neat circular shape from sturdy cardboard. You will also need smaller cardboard pieces for hour indicators, a cutting tool, paint, glue, and a clock mechanism which is inexpensive and easily available. Paint the cardboard circle in your chosen color and allow it to dry fully. Attach the hour indicators around the circle using glue, ensuring even spacing for accuracy. Insert the clock mechanism through a small hole in the center and attach the clock hands based on the instructions provided with the mechanism. The finished piece can be mounted on any wall using light adhesive. The result is a custom decorative clock that adds both functionality and style to your space. This project shows how cardboard can replace heavier materials while still delivering an attractive final design. It is ideal for craft rooms, home offices, or family areas where practical decor is appreciated. The ability to customize colors, numbers, and patterns makes this DIY clock a unique and personalized piece that reflects your creative preferences.