
10 Tissue paper flowers DIY
Tissue paper flowers are a simple, affordable, and beautiful way to add a personal touch to your home décor, parties, and events. Unlike real flowers, tissue paper flowers last indefinitely, allowing you to enjoy their beauty without worrying about wilting or maintenance. They are also highly customizable—you can mix colors, shapes, and sizes to suit any occasion. From birthday parties and weddings to seasonal decorations and classroom projects, tissue paper flowers can bring charm and creativity wherever they are used. Making tissue paper flowers is a fun activity for both adults and children, offering an opportunity to practice patience, fine motor skills, and artistic expression.
In this blog post, we will explore 10 creative DIY tissue paper flower ideas. For each flower type, we will provide a detailed list of materials, step-by-step instructions, and helpful tips to make your crafting process easier. Whether you are a beginner or an experienced crafter, these ideas will inspire you to transform simple sheets of tissue paper into stunning floral decorations. By the end of this post, you will have a collection of flowers that can brighten up any space, celebrate special occasions, or even serve as thoughtful handmade gifts.
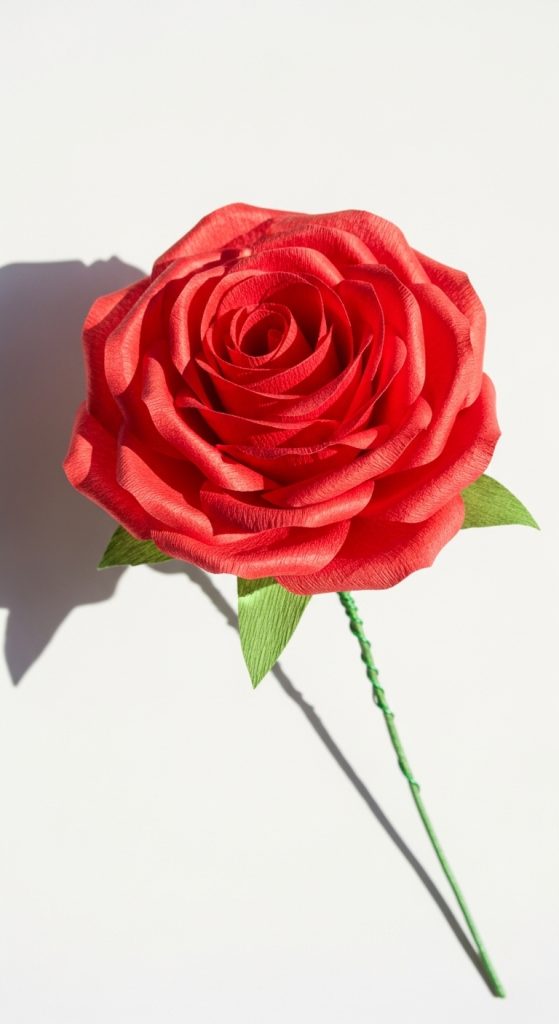
1. Classic Tissue Paper Rose
Materials: Tissue paper in your preferred color, green floral wire, scissors, and tape.
Start by cutting five or six squares of tissue paper, each around 5×5 inches. Stack them neatly and fold them accordion-style with folds about one inch wide. Once folded, secure the center with a small piece of floral wire, twisting it tightly to hold the paper in place. Gently pull each layer of tissue paper upwards and outwards to form petals, shaping them to resemble a blooming rose. Adjust the petals until you achieve a natural look.
For the stem, wrap the floral wire with green floral tape, starting from the base of the flower and moving down to cover the entire wire. You can make multiple roses in different colors and sizes to create a bouquet. These roses are ideal for table centerpieces, gift toppers, or wall decorations. The key to a realistic look is to carefully shape each petal and make the folds slightly uneven, which mimics the natural imperfections of a real rose.
2. Tissue Paper Peony
Materials: Tissue paper sheets, scissors, green floral tape, and wire.
Cut 8–10 sheets of tissue paper into rectangles measuring 6×8 inches. Stack the sheets together and fold them accordion-style along the shorter side. Tie the center tightly with a piece of floral wire. Round the corners of the folded tissue paper using scissors to give a softer, more natural petal shape.
Gently separate the layers, pulling them upwards and outwards to create the fluffy appearance of a peony. Adjust the petals until the flower looks full and symmetrical. Wrap the wire with green floral tape for a neat finish. Tissue paper peonies are larger than roses and create an impressive visual impact when used in wall decorations, party backdrops, or even wedding bouquets. Mixing multiple colors in one flower gives a beautiful gradient effect that resembles real peonies.

3. Tissue Paper Carnation
Materials: Tissue paper sheets, floral wire, scissors, and tape.
Cut tissue paper into rectangles of about 5×7 inches. Stack three to four sheets together and make small, even cuts along the edges to create fringes. Fold the stack accordion-style and secure the center with a piece of floral wire. Pull each fringe layer up to open the flower and create a ruffled look.
Tissue paper carnations are known for their fullness and delicate texture. They are perfect for party decorations, gift wrapping, or DIY bouquets. The fringe technique gives the flower a realistic texture that makes it stand out in arrangements. Carnations can be made in different sizes, and you can combine several small ones to make a striking centerpiece. Use contrasting colors or multiple layers to add depth and richness to the flower.

4. Tissue Paper Tulip
Materials: Tissue paper, scissors, floral wire, and green tape.
Cut a rectangle of tissue paper about 5×8 inches. Fold it in half lengthwise, then cut the top edges into a rounded point to resemble tulip petals. Wrap a piece of floral wire around the base of the flower to secure it. Gently open the petals and shape them to resemble a natural tulip.
Wrap the wire with green floral tape to form a stem. You can create leaves by cutting green tissue paper into small leaf shapes and attaching them to the wire. Tulips are elegant flowers that work well for spring-themed decorations, gift bouquets, and floral arrangements. They are simple to make, and their smooth, sleek petals create a clean, polished look. Combining tulips of different colors adds vibrancy and variety to your designs.

5. Tissue Paper Lily
Materials: Tissue paper, floral wire, tape, and scissors.
Cut a tissue paper rectangle about 6×10 inches. Fold it into a fan shape along the shorter side. Tie the center with floral wire and cut the ends into a pointed shape to resemble lily petals. Gently separate the layers, pulling each petal outward to form a realistic lily shape.
Add green tape around the wire to create a stem. For a more realistic touch, slightly curl the tips of the petals using a pencil. Tissue paper lilies are larger and more dramatic than roses or tulips, making them suitable for wall decorations, large bouquets, or event décor. Using vibrant colors such as orange, red, or yellow creates an eye-catching effect that will draw attention in any room.

6. Tissue Paper Sunflower
Materials: Yellow tissue paper, brown tissue paper, scissors, floral wire, and glue.
Cut several yellow tissue paper rectangles into petal shapes. For the center, crumple a small piece of brown tissue paper into a ball. Stack the yellow petals and attach them around the brown center using glue or tape. Secure the flower to a piece of floral wire wrapped in green tape for the stem.
Sunflowers are bold, cheerful flowers that instantly brighten up any space. They are perfect for summer or autumn décor, DIY wreaths, or party decorations. Mixing a few small sunflowers with larger ones adds a dynamic look to arrangements. These flowers are also ideal for classrooms or children’s projects because they are simple to assemble yet visually striking.

7. Tissue Paper Dahlia
Materials: Tissue paper, scissors, floral wire, tape, and optional markers.
Cut tissue paper into squares of approximately 4×4 inches. Stack 8–10 squares and fold them accordion-style. Tie the center with floral wire. Round the corners and gently pull each layer outward to create the petal effect of a dahlia. Optionally, color the edges with markers to add depth and dimension.
Dahlias have a layered appearance, making them visually complex and decorative. They are great for centerpieces, hanging decorations, or seasonal displays. Using gradient colors or blending multiple shades of tissue paper can enhance their natural beauty. The key is to pull the petals carefully to achieve fullness without tearing the paper.

8. Tissue Paper Orchid
Materials: Tissue paper in soft colors, floral wire, scissors, and tape.
Cut tissue paper into smaller rectangles about 3×5 inches. Fold them lightly and twist the center to secure with wire. Gently separate the petals, creating a delicate, open shape. Orchids have a unique and elegant structure, so shaping the petals carefully gives a realistic look.
Attach green tape to form a stem. Orchids are excellent for minimalist décor, gift decorations, or floral arrangements where a delicate, exotic appearance is desired. They pair beautifully with other tissue paper flowers in bouquets, adding variety and sophistication.

9. Tissue Paper Daisy
Materials: White and yellow tissue paper, scissors, floral wire, and glue.
Cut white tissue paper into long, thin strips for petals. Roll a small piece of yellow tissue paper into a tight ball for the center. Glue the white strips around the yellow ball in a circular pattern. Secure the flower with a piece of floral wire wrapped in green tape.
Daisies are cheerful and simple to make, making them ideal for spring décor or casual events. They are versatile and can be combined with other flowers to create colorful arrangements. Using slightly different petal lengths adds a natural, charming look. Daisies are perfect for children’s crafts and party decorations due to their simplicity and bright appearance.

10. Tissue Paper Hydrangea
Materials: Tissue paper in multiple colors, scissors, floral wire, and tape.
Cut tissue paper into small squares, about 2×2 inches. Stack 6–8 squares, fold them slightly in the center, and twist to secure with floral wire. Pull apart the layers to create a rounded, clustered effect. Repeat to create multiple small flowers and group them together to form a hydrangea cluster.
Hydrangeas have a full, lush appearance that is ideal for bouquets, table centerpieces, and wall décor. Using different shades of tissue paper adds depth and realism. These flowers are perfect for making large arrangements that have a soft, romantic feel. Grouping many hydrangea flowers together creates a striking visual display.
