10 Home Photoshoot ideas
Capturing beautiful photographs at home has become one of the most enjoyable and accessible ways to express creativity. Whether you use a professional camera or a smartphone, your home can easily transform into a personal studio filled with endless possibilities. A home photoshoot allows you to explore lighting, styling, backgrounds, composition, mood setting, and props in a comfortable environment without the pressure of outdoor locations or time constraints. This guide offers ten complete home photoshoot ideas, each explained in detail with preparation steps, materials required, tips for setup, and suggestions for achieving the best results. The goal is to help you create professional looking photos without needing advanced equipment or complicated setups. With a little creativity, the right lighting, and thoughtful planning, your home can become an inspiring space for photography. This article provides a step by step breakdown of each idea to help you capture stunning images suitable for social media, portfolios, personal keepsakes, or creative projects. Every section contains practical insights that photographers of all skill levels can follow. Whether you prefer lifestyle photography, portraits, product setups, or aesthetic visuals, these home photoshoot ideas will elevate your photography and boost your imagination.
1. Natural Window Light Portrait Session
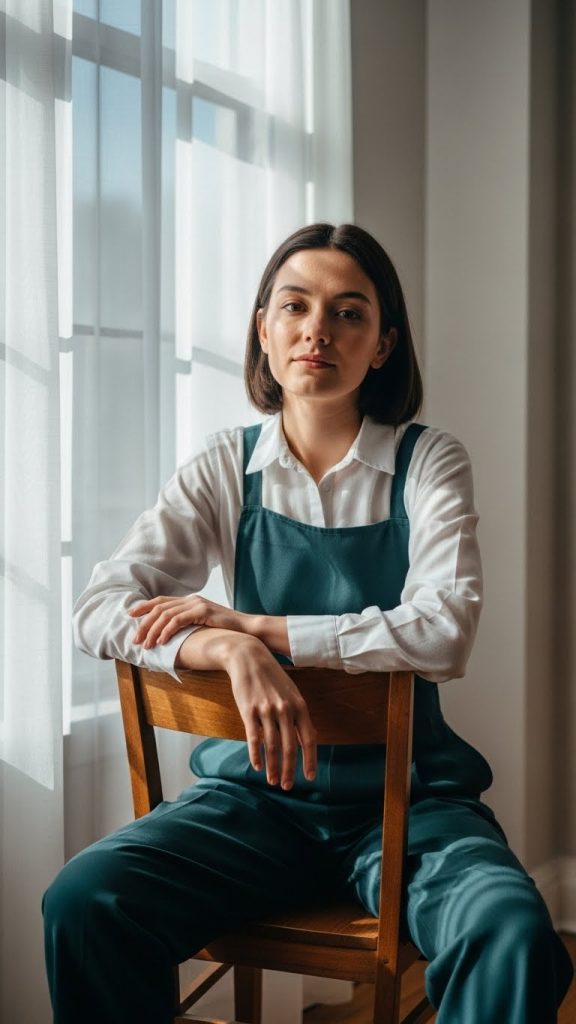
Window light is one of the most powerful tools for indoor photography. It offers soft, flattering illumination that enhances facial features and creates beautiful shadows. This setup requires minimal equipment and works well in almost any room with a window. The key preparation step is selecting the right window. South facing windows give consistent light throughout the day, while east and west facing ones offer dramatic sunlight during morning or evening. Start by clearing the area around the window. Remove clutter and place a clean chair, stool, or cushion near the light source. If the sunlight is too harsh, use a sheer curtain or a thin white sheet to diffuse the light. Prepare neutral clothing, soft textures, and minimal accessories for natural portraits. For materials, you need a smartphone or camera, reflector or a white cardboard piece, a curtain or diffuser, and a basic background. Direct the subject to face the window or turn at a slight angle for softer side lighting. Experiment with close ups, half body shots, and profile angles. Use the reflector to bounce light onto the shadowed side of the face. This idea is ideal for high quality portraits without professional lights.
2. Cozy Bed or Sofa Lifestyle Shoot
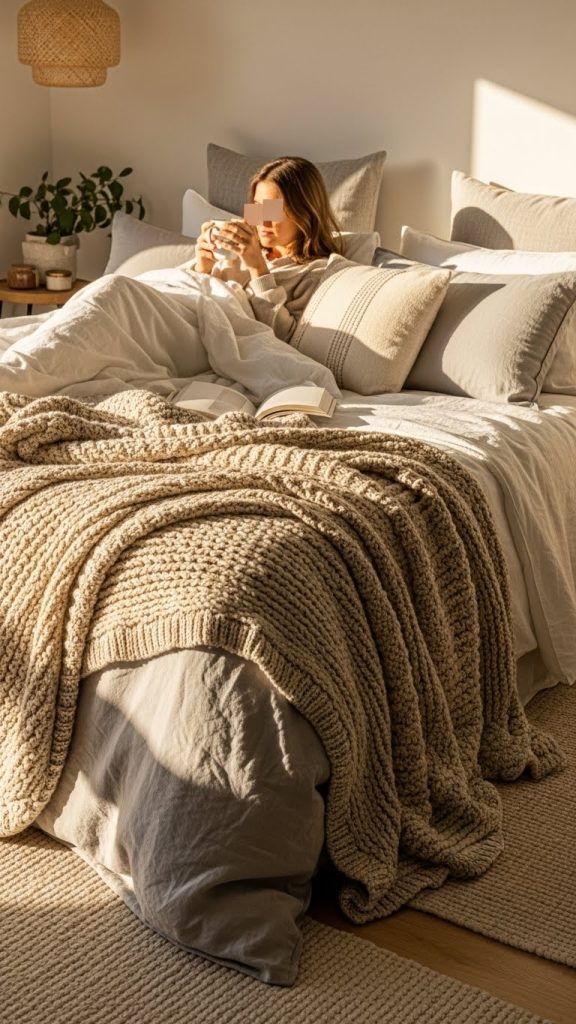
A cozy indoor photoshoot creates warm, intimate, and inviting visuals. This idea works well for lifestyle content, personal branding, or casual portrait photography. Begin by preparing a clean and coordinated color palette for your bedding or sofa setup. Soft neutrals like beige, cream, gray, and white help maintain a calm and cohesive look. Add layers such as blankets, pillows, or textured fabrics to make the space visually appealing. Natural morning light works best for this type of shoot, so open the curtains to brighten the area. If lighting is too dim, use a small lamp placed behind the camera to gently illuminate the scene. Materials for this setup include blankets, pillows, a cup or book for props, coordinated outfits, and a tripod for capturing steady images. Position the subject lying, sitting, or lounging comfortably. Candid poses often produce the most natural results. Encourage movement such as adjusting pillows, holding a mug, reading, or stretching. Use a slightly higher angle to capture the environment while focusing on the subject. This approach creates lifestyle images that feel authentic and relaxed, making them ideal for social media and personal storytelling.
3. Minimalist Wall Backdrop Portraits
A plain wall can become an effective backdrop for clean, modern portraits. The aim of this setup is to highlight the subject without distractions. Begin by selecting a wall painted in white, beige, or any solid color that contrasts with the subject’s clothing. Make sure the wall is clean and free from marks. A ring light or softbox can enhance the depth of the image, but if you do not have one, use natural light from a nearby window. Preparation materials include a solid colored outfit, tripod, tape for guiding poses, and a stool if you want variety in poses. Place the subject about one to two steps away from the wall to avoid shadows. This positioning also creates a slight depth of field which makes the background look smoother. Use basic portrait compositions such as full body, mid length, or close up shots. The minimalist background allows for creative posing such as leaning, sitting, looking over the shoulder, or simple standing positions. Keep accessories minimal so the overall image remains clean. Experiment with shadows by adjusting your light source. This setup produces timeless portrait photography suitable for professional or creative purposes.
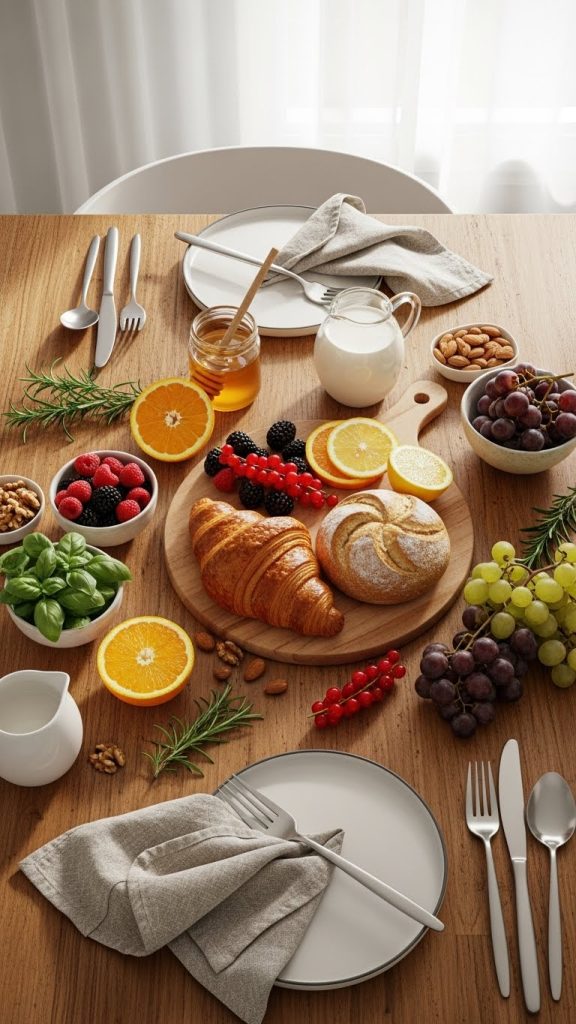
4. Kitchen or Dining Table Food Photography Setup
Food photography is an excellent home photoshoot idea that allows you to use your kitchen as a fully functioning studio. Begin by organizing the table surface and choosing a clean backdrop. Wooden tables, marble countertops, or plain boards work well for food photos. For preparation, select food items with good color contrast and appealing textures. Fresh ingredients like fruits, baked goods, or beverages create vibrant visuals. Lighting is crucial. Use side lighting from a window to highlight textures and shadows. If lighting is uneven, place a reflector or white cardboard on the opposite side. Materials include plates, utensils, napkins, cutting boards, and accessories such as flowers or herbs for styling. Arrange the items in layers to create depth. Choose one hero dish and build the scene around it. Use overhead shots for flat lay compositions or side angles for tall items like glasses or cakes. Keep the background clutter free and maintain focus on the main subject. Food photography requires attention to detail, so adjust positioning until the arrangement feels balanced. This setup helps you capture high quality food images suitable for blogs, menus, or personal projects.
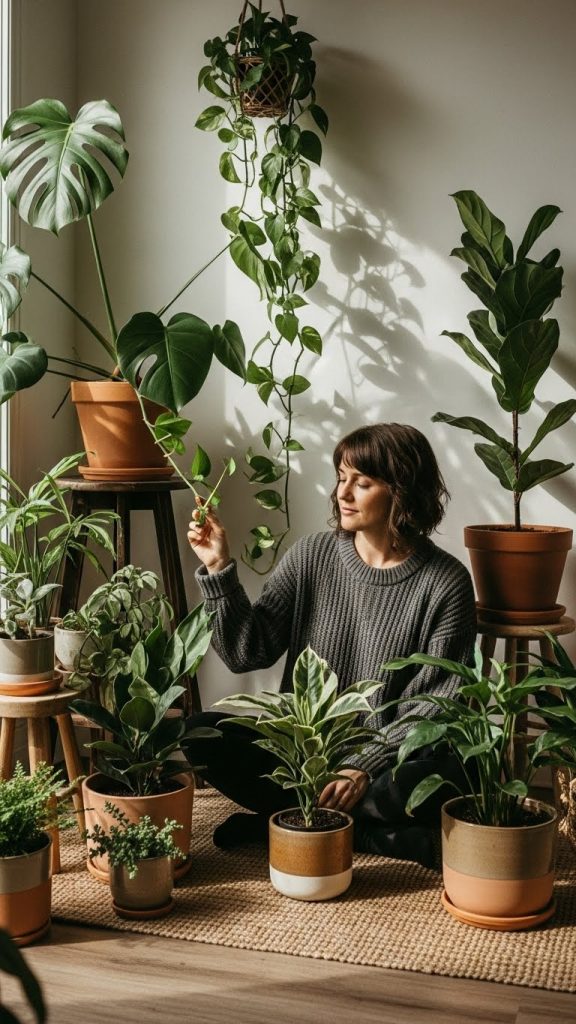
5. Indoor Plants Aesthetic Corner Shoot
Indoor plants offer a refreshing and natural element for home photography. This idea is perfect for lifestyle shots, portraits, product photos, or creative compositions. Start by selecting a corner of your home where plants receive soft natural light. Clean the area and arrange the plants in different heights and layers. Tall plants can go in the back, while small pots or succulents can sit on stools, shelves, or tables. Preparation materials include plants, small props, neutral fabrics, a chair, and a camera or smartphone. You can also use a watering can, books, or a cup to add subtle storytelling elements. For lighting, rely on window light or a soft artificial light source. Position the subject near the plants and experiment with angles such as sitting, leaning, or interacting with the leaves. For product photography, place the item among the plants to create an organic frame. Textures like pottery and wicker baskets add warmth to the scene. Use shallow depth of field to soften the background and highlight key details. This setup creates a calm and earthy aesthetic that photographs beautifully and works well across various photography styles.
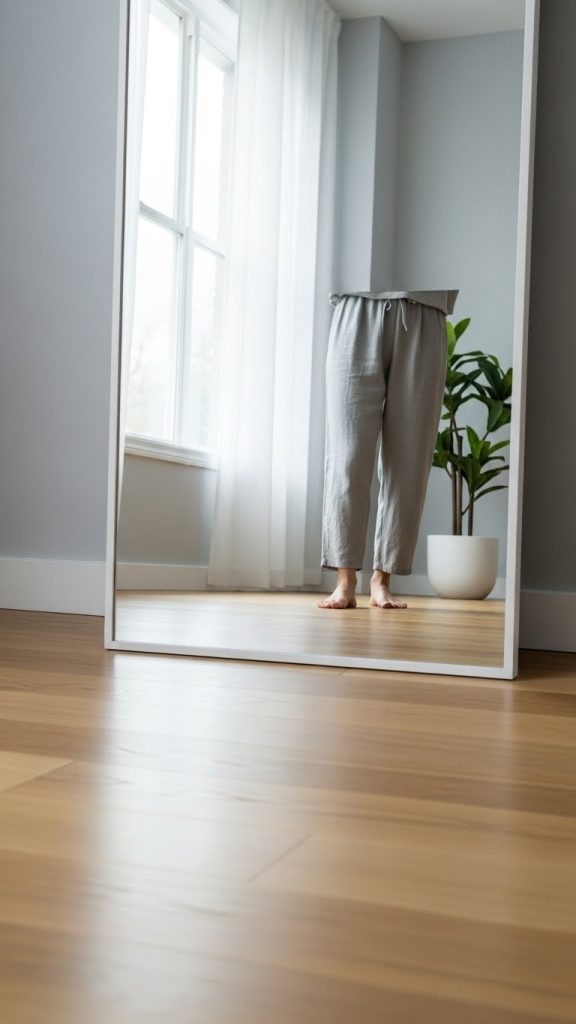
6. Mirror Reflection Creative Photography
Mirror reflection photography allows you to capture unique perspectives and artistic compositions at home. Begin by choosing a clean mirror, preferably rectangular or circular, depending on your preference. Make sure the mirror is spotless since smudges can affect the final image. Prepare the area by placing the mirror on the floor, against a wall, or holding it at an angle. Natural lighting works best for reflection photography. Place the mirror where it catches soft window light without harsh glare. Materials include a mirror, microfiber cloth, tripod, and simple background elements. If you want outdoor sky reflections while staying indoors, position the mirror near a window to capture clouds or light. Experiment with framing by positioning the camera so the mirror becomes the focus while hiding the edges of the room. You can use the mirror for self portraits, outfit shots, or creative composition. Try photographing only the reflection to create an illusion of depth. This technique allows endless experimentation and produces imaginative visuals with minimal props.
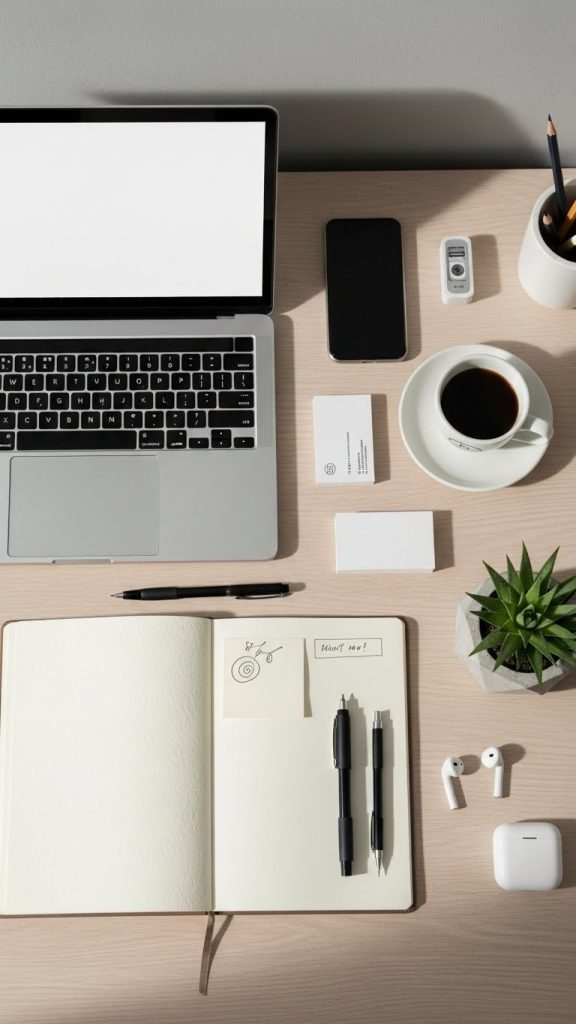
7. Desk Workspace Flat Lay Shoot
Flat lay photography is ideal for showcasing objects in a visually pleasing arrangement. A desk or table can serve as the perfect base for this setup. Begin by decluttering the surface and choosing a background that suits your theme. White boards, wooden surfaces, or neutral paper sheets work well as backgrounds. Preparation materials include stationery, tech gadgets, coffee cups, notebooks, and any items you want to feature. Lighting should come from one side to create soft shadows and texture. If the light is too harsh, diffuse it with a thin fabric. Arrange items deliberately with attention to spacing and balance. Keep the composition symmetrical or follow the rule of thirds for a more dynamic layout. Use a tripod or hold the camera directly above the setup to capture a stable image. Avoid overcrowding the frame. Leave breathing space around key items to draw focus. Flat lays are great for social media, branding, and product photography. They allow full creative control over color palettes, textures, and arrangement. This home based photoshoot idea is simple, effective, and highly customizable.
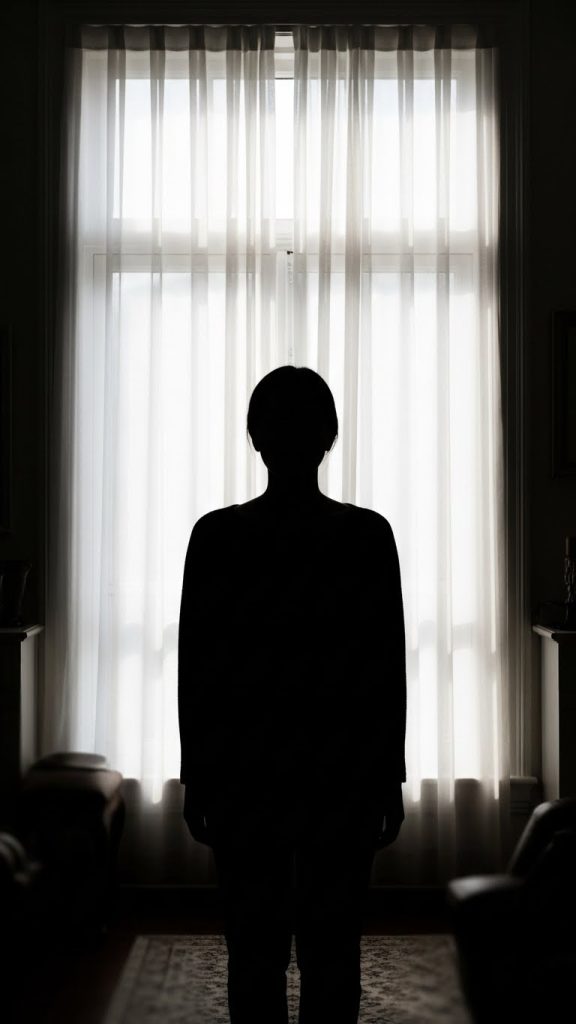
8. Backlit Silhouette Window Shoot
A silhouette photoshoot adds drama, contrast, and artistic flair to indoor photography. The main element in this idea is strong backlighting from a window. Begin by selecting a window with bright daylight. Remove heavy curtains and keep only sheer curtains if you want a softer glow. Have the subject stand directly in front of the window. In terms of preparation, choose outfits with clear shapes or flowing fabric that enhance the silhouette effect. Materials include a tripod, window with strong light, and minimal background elements. To achieve the silhouette effect, manually lower the exposure on your phone or camera until the subject appears dark while the background remains bright. Experiment with poses such as profile shots, reaching out, stretching, or simple standing positions. For added creativity, introduce props like hats, long dresses, or musical instruments. Silhouette photography works best when the shapes are well defined and the subject maintains clear outlines. This setup is easy to create yet produces artistic and dramatic photos.
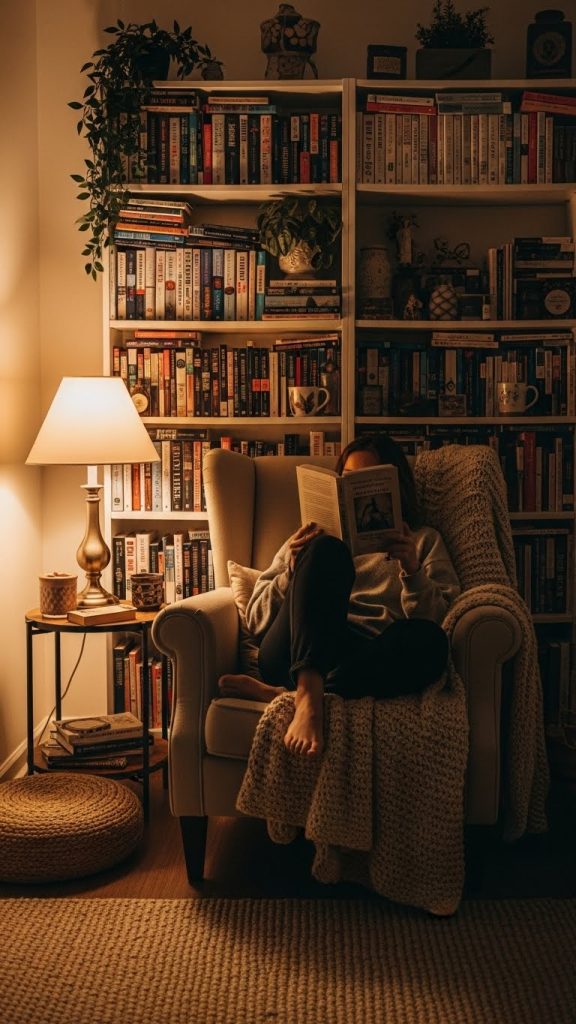
9. Reading Nook or Study Corner Shoot
Photos taken in a reading nook or study corner can showcase a peaceful, thoughtful, and cozy atmosphere. Begin by selecting a quiet corner with a chair, shelves, lamp, or a small table. Clean the area and arrange books in neat stacks. Add soft textiles like blankets or cushions to make the scene inviting. Preparation materials include books, mugs, glasses, neutral clothing, and natural lighting from a window or lamp. Use warm light for a storytelling effect. Position the subject reading, writing, or simply relaxing. Use angles from the side or slightly above to capture both the subject and the surrounding props. Include intentional details such as bookmarks, open pages, or a notebook. This type of photoshoot works well for lifestyle photography, content creation, and mood based visuals. Focus on capturing the peaceful ambiance by avoiding clutter and maintaining soft, warm tones.
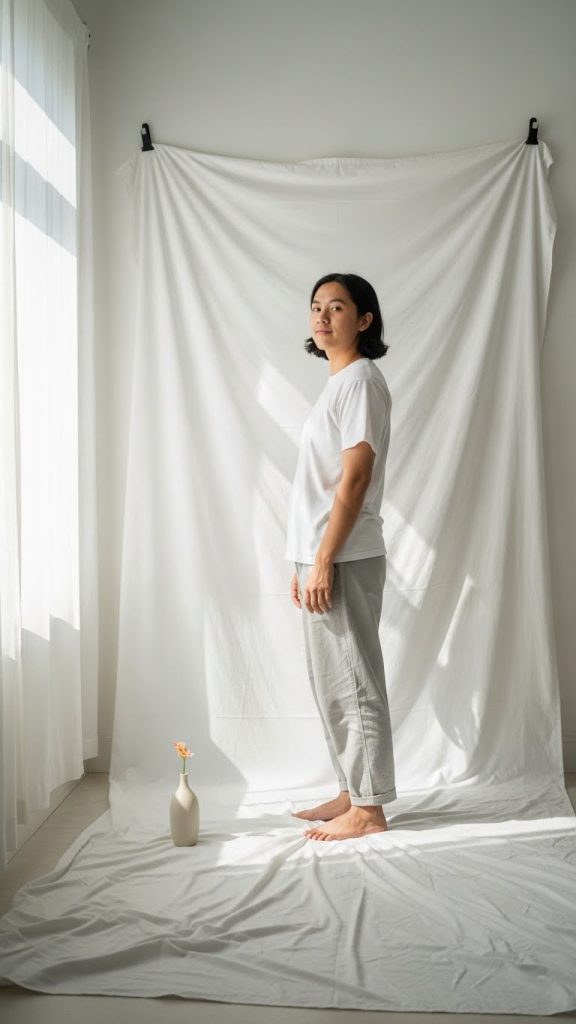
10. DIY Home Studio with Bedsheet Backdrops
Creating a simple home studio using bedsheets is one of the easiest and most effective ways to achieve professional looking photos. Begin by selecting plain bedsheets in white, beige, gray, or any color that complements your theme. Hang the sheet against a wall using tape, clips, or hooks. Make sure the sheet is smooth and free from wrinkles. Preparation materials include bedsheets, clamps, a tripod, and one or two lights. If using natural light, position the setup near a window. Layer the bedsheet with another fabric if you want texture. Have the subject stand a few steps away from the backdrop to prevent shadows. Experiment with different poses and angles. This setup is perfect for portraits, product photography, fashion shots, and creative concepts. You can also bring in props such as chairs, flowers, or books to add character. This DIY studio is budget friendly and allows full creative control.