10 Cricut Paper Projects
Cricut machines have changed the way people work with paper. What once required hours of cutting by hand can now be done quickly, neatly, and with professional results. Whether you are a beginner or someone with experience, paper projects are one of the best ways to use a Cricut machine. Paper is affordable, easy to find, and forgiving if you make mistakes. It is also very versatile, allowing you to create decorations, gifts, and useful items for your home or business.
Cricut paper projects are popular because they do not require expensive tools or complicated materials. With the right preparation, you can create beautiful designs using cardstock, patterned paper, and simple adhesives. These projects are also ideal for selling, gifting, or decorating for special events like birthdays, weddings, and holidays. Another advantage is that paper projects help you learn how to use Cricut Design Space, understand blade settings, and improve cutting accuracy.
In this blog post, you will find ten Cricut paper projects explained in detail. Each idea includes preparation tips, materials needed, how to use the Cricut machine, and practical advice to achieve clean and professional results. These projects are suitable for home use and can be scaled for small businesses as well.
1. Paper Greeting Cards
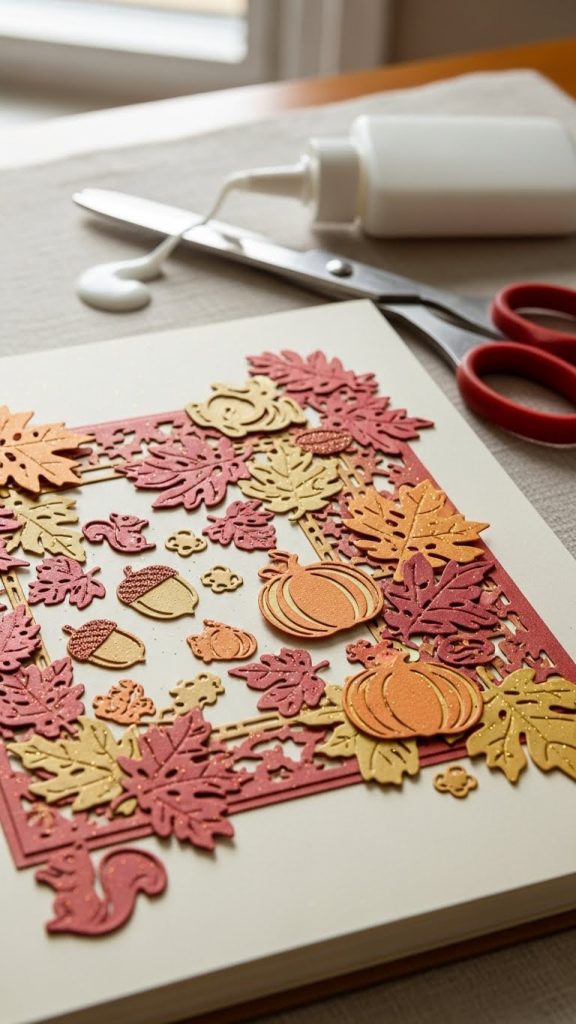
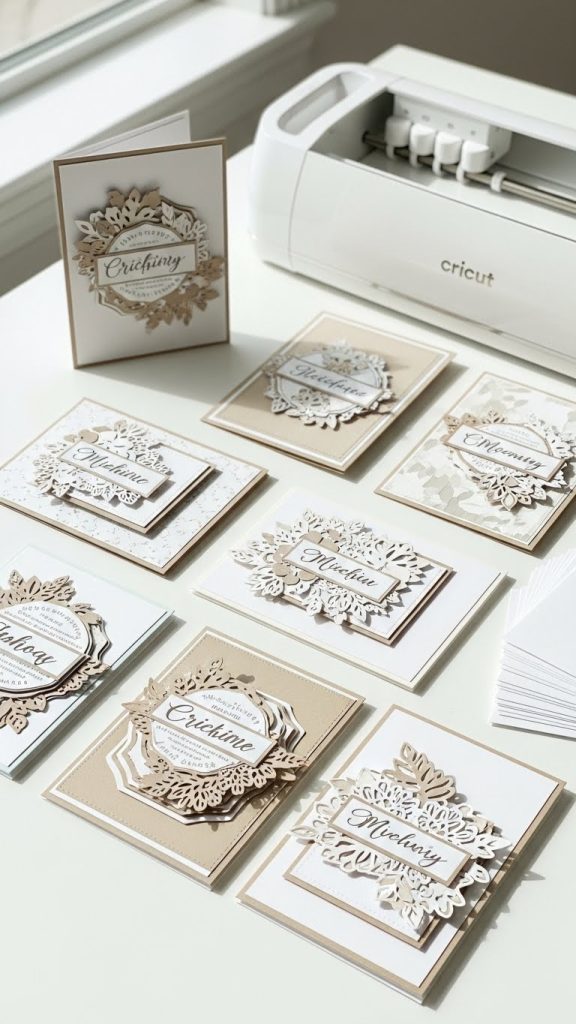
Paper greeting cards are one of the most popular Cricut paper projects. They are easy to customize and perfect for birthdays, weddings, holidays, and thank you notes. With a Cricut machine, you can cut detailed designs, layered shapes, and clean text that looks professional.
Preparation
Before starting, decide the size of your card and the occasion. Open Cricut Design Space and choose or design a card layout. Make sure the design fits your cardstock size. Test your cut settings on scrap paper first.
Materials Used
You will need cardstock, a Cricut cutting mat, a fine point blade, glue or double-sided tape, and optional embellishments like glitter paper or vellum.
How to Make
Load the cardstock onto the mat and let the Cricut cut your design. Fold the base neatly using a scoring stylus or manual fold. Assemble layers carefully using adhesive, aligning edges properly.
Tips
Use medium-weight cardstock for the base so the card stands well. Keep designs simple for everyday cards and add layers for special occasions. Store finished cards flat to avoid bending.
2. Paper Flowers
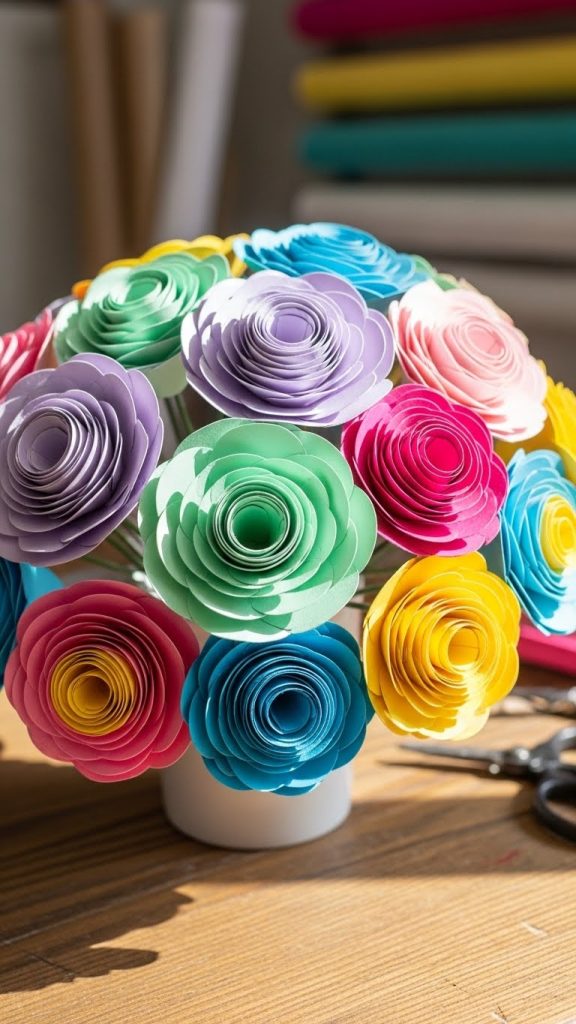
Paper flowers are beautiful decorative items that last longer than real flowers. Cricut machines make it easy to cut petal shapes with consistent size and smooth edges. These flowers can be used for wall decor, bouquets, gift wrapping, or event decoration.
Preparation
Choose a flower design that matches your skill level. Some flowers require rolling, while others need layering. Adjust the size in Design Space according to your project needs.
Materials Used
Cardstock or crepe paper, glue gun or craft glue, floral wire or wooden sticks, and a Cricut cutting mat.
How to Make
Cut all flower pieces using the Cricut. Shape petals gently using your fingers or a shaping tool. Assemble petals layer by layer, starting from the center and working outward.
Tips
Use lighter paper for softer-looking flowers and heavier cardstock for structured designs. Cut extra petals in case of mistakes. Practice rolling techniques for rose-style flowers.
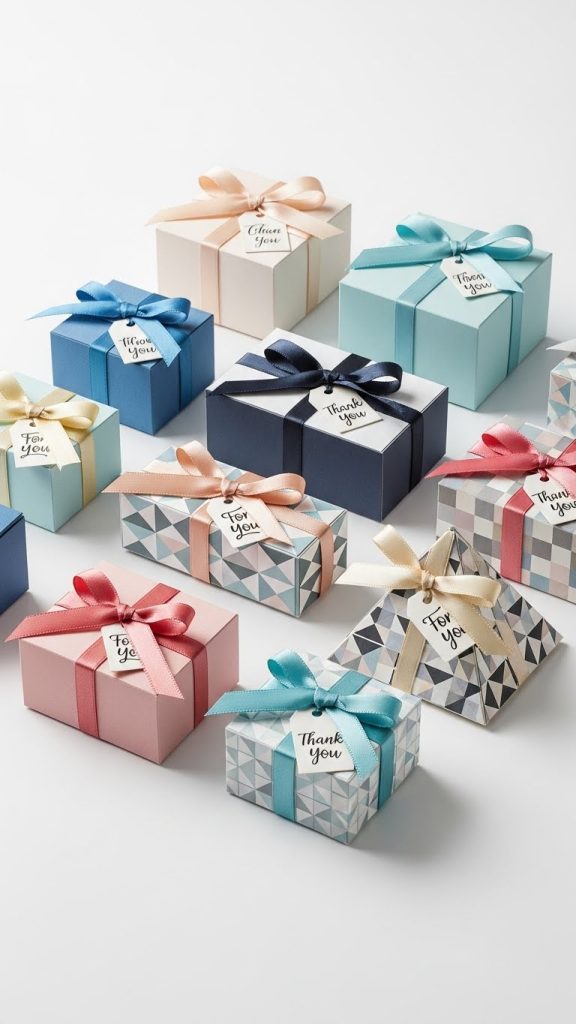
3. Paper Gift Boxes
Paper gift boxes made with a Cricut are perfect for small gifts, favors, and product packaging. They can be customized with names, logos, or themed designs.
Preparation
Select a box template in Cricut Design Space. Measure the item that will go inside to ensure the box size is correct. Choose cardstock that is strong enough to hold its shape.
Materials Used
Heavy cardstock, scoring tool, glue, and optional ribbon or labels.
How to Make
Cut and score the box template using the Cricut. Fold along the score lines carefully. Glue tabs securely and allow them to dry before placing items inside.
Tips
Use thick cardstock for durability. Avoid overloading the box with heavy items. Decorative paper works best for gift boxes, while plain cardstock is better for storage.
4. Paper Wall Art
Paper wall art is an affordable way to decorate your home. Cricut machines allow you to create layered designs, quotes, and shapes that look clean and modern.
Preparation
Decide on the size of your wall art and frame. Design your artwork in layers so each piece cuts separately. Choose colors that match your room decor.
Materials Used
Cardstock in different colors, frame or backing board, adhesive, and a Cricut cutting mat.
How to Make
Cut each layer using the Cricut. Assemble the layers carefully on a flat surface. Attach the finished design to a backing board or frame.
Tips
Use foam tape for a raised, layered effect. Keep designs simple for a clean look. Avoid direct sunlight to prevent fading.
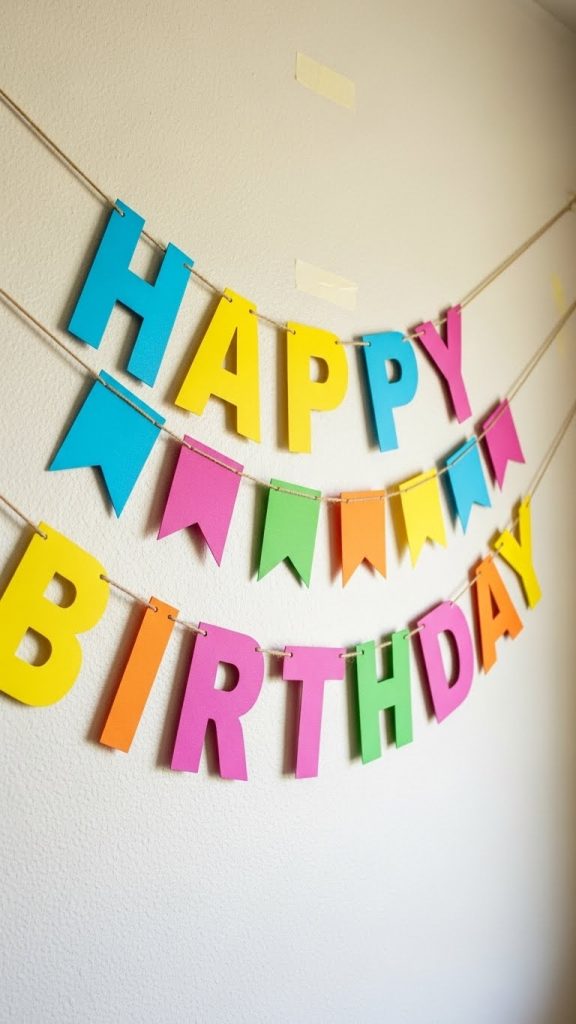
5. Paper Party Banners
Party banners are popular for birthdays, baby showers, and celebrations. Cricut makes it easy to cut letters and shapes that look uniform and professional.
Preparation
Plan the message and count the number of letters needed. Decide on banner shape and size. Lay out the design in Cricut Design Space.
Materials Used
Cardstock, twine or ribbon, hole punch, and adhesive.
How to Make
Cut the banner pieces and letters using the Cricut. Assemble letters onto shapes. Punch holes and string the banner using ribbon or twine.
Tips
Use bold fonts for better readability. Keep spacing consistent. Store banners flat for reuse.
6. Paper Scrapbook Embellishments
Scrapbook embellishments add detail and personality to memory albums. Cricut machines allow you to create themed shapes, titles, and decorations quickly.
Preparation
Choose a scrapbook theme such as travel, birthday, or family. Design embellishments in small sizes suitable for pages.
Materials Used
Patterned paper, cardstock, adhesive dots, and a Cricut cutting mat.
How to Make
Cut embellishments in batches. Layer shapes for depth. Attach them to scrapbook pages using removable adhesive if needed.
Tips
Avoid bulky designs that make albums hard to close. Keep extra embellishments for future pages. Label designs clearly in storage.
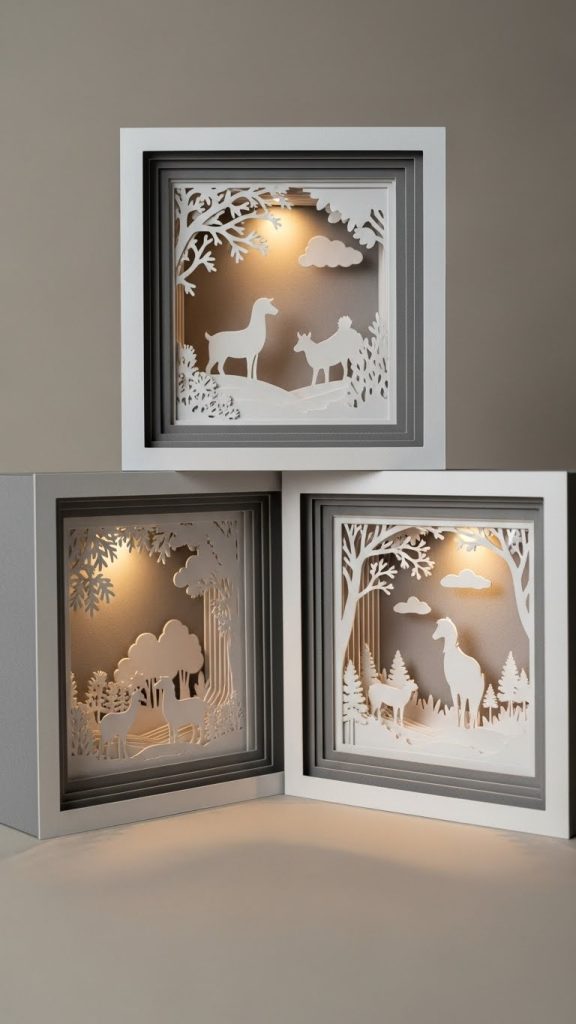
7. Paper Shadow Boxes
Shadow boxes made with paper layers create a beautiful depth effect. They are popular as gifts and home decor items.
Preparation
Design multiple layers with small cut-out details. Ensure each layer aligns properly. Choose a deep frame.
Materials Used
Cardstock, foam spacers, shadow box frame, and adhesive.
How to Make
Cut all layers using the Cricut. Assemble layers using spacers to create depth. Place inside the frame and secure.
Tips
Use contrasting colors for better visibility. Keep cuts clean and detailed. Handle carefully to avoid bending layers.
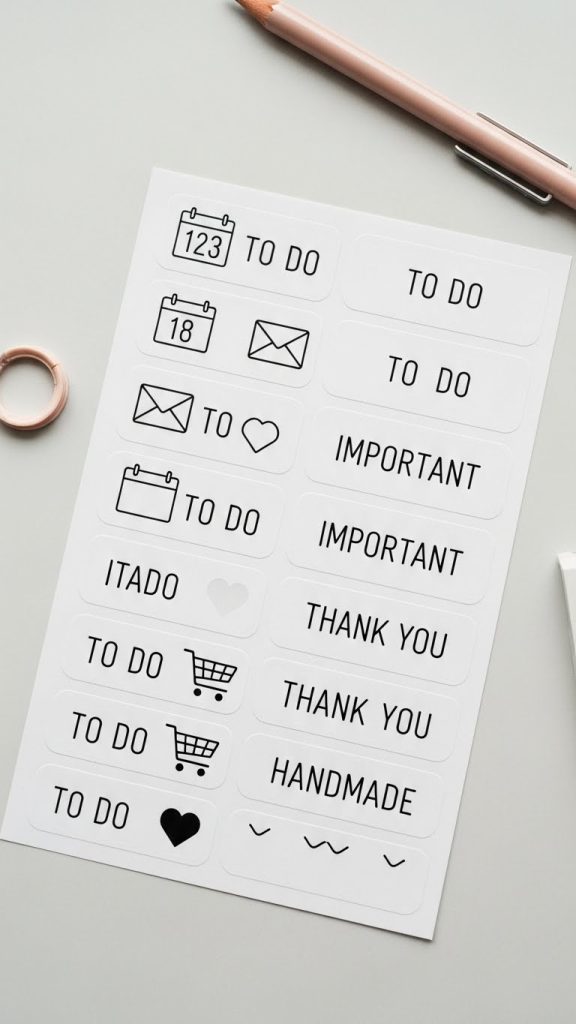
8. Paper Stickers and Labels
Paper stickers and labels are useful for planners, packaging, and organization. Cricut machines can cut precise shapes quickly.
Preparation
Design sticker shapes in Cricut Design Space. Choose print then cut settings if using printed designs.
Materials Used
Sticker paper, printer, Cricut cutting mat, and fine point blade.
How to Make
Print the design on sticker paper. Load it onto the mat and let the Cricut cut the shapes accurately.
Tips
Calibrate your machine for accurate cuts. Store stickers in a dry place. Use simple shapes for beginners.

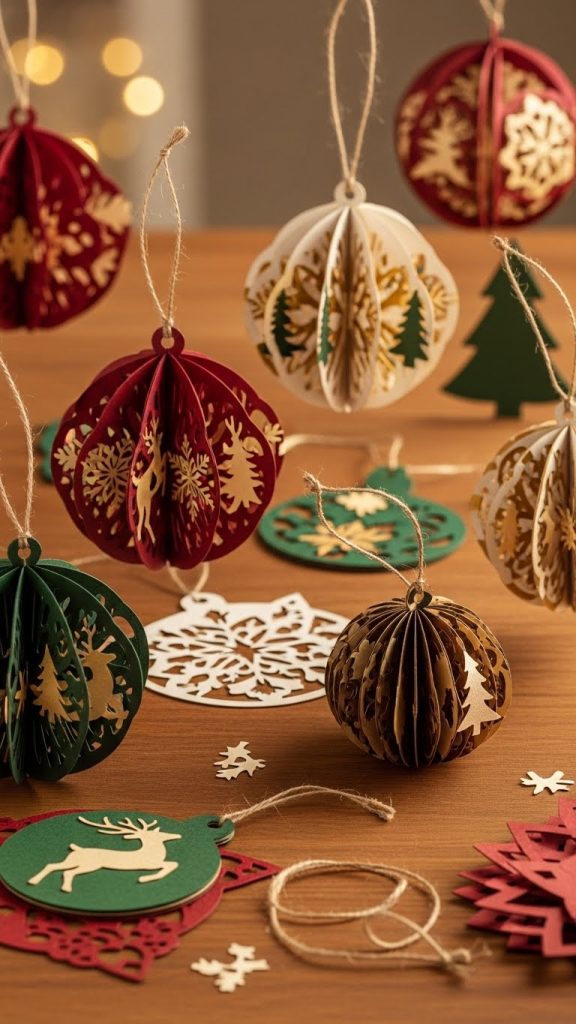
9. Paper Ornaments
Paper ornaments are great for holidays and special occasions. They are lightweight and easy to store.
Preparation
Choose ornament designs suitable for folding or layering. Select festive colors.
Materials Used
Cardstock, string or ribbon, glue, and Cricut cutting mat.
How to Make
Cut ornament shapes using the Cricut. Assemble pieces by folding or layering. Add string for hanging.
Tips
Use sturdy cardstock to maintain shape. Avoid moisture exposure. Store ornaments in boxes.
10. Paper Planner Inserts
Planner inserts made with a Cricut help with organization and customization. They can be used daily or weekly.
Preparation
Measure your planner size accurately. Design inserts with clean lines and readable text.
Materials Used
Light cardstock or paper, hole punch, and Cricut cutting mat.
How to Make
Cut inserts using the Cricut. Punch holes to fit your planner. Arrange sections neatly.
Tips
Use thin paper for easy flipping. Keep designs simple for daily use. Test sizes before cutting in bulk.