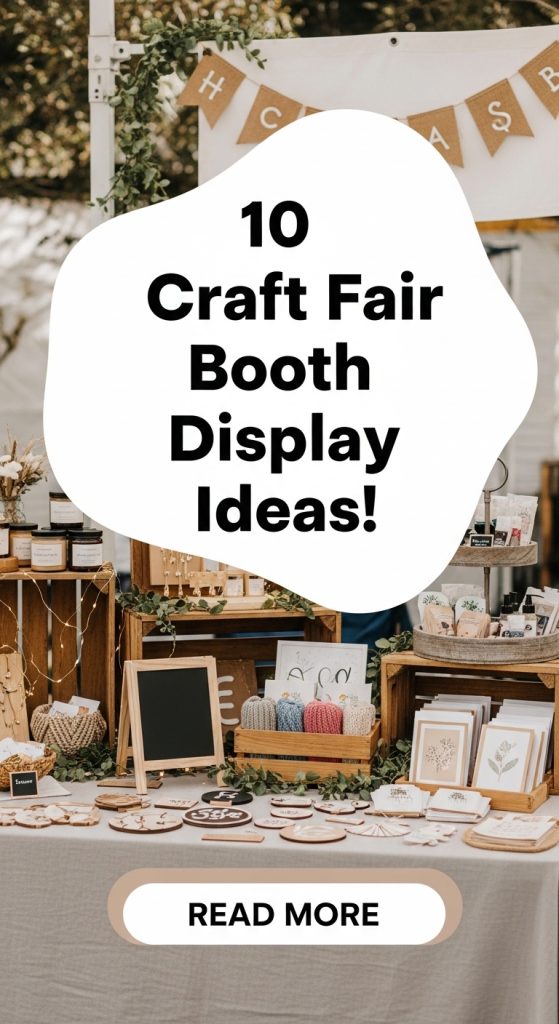
10 Craft Fair Booth Display
A craft fair is an exciting opportunity to showcase handmade goods, connect with customers, and grow your brand. However, a successful craft fair booth is not just about having beautiful products. The way you present your items, organize your space, and engage visitors can make the difference between strong sales and a missed opportunity. Every detail, from lighting and table layout to signage and branding, contributes to the overall impression your booth leaves on potential buyers.
Preparing for a craft fair requires careful planning. You need to think about how your booth will look from different angles, how customers will navigate your space, and how to make products easily accessible. Materials, display structures, and practical tools also play an essential role in creating an attractive and functional setup. A well-planned booth reduces stress, increases customer interest, and creates a memorable shopping experience.
This guide provides 10 craft fair booth display ideas. Each point includes preparation tips, recommended materials, and practical advice to make your booth appealing and efficient. Whether you are a beginner or an experienced seller, these ideas will help you create a booth that draws attention and encourages sales.
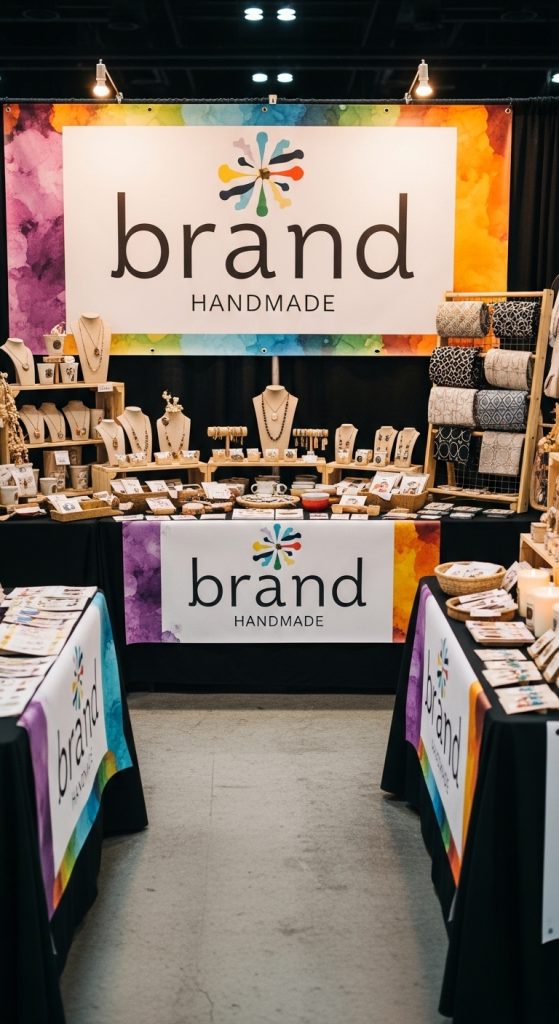
1. Eye-Catching Branding at a Glance
Your brand identity is the first thing customers notice. A clear and attractive display of your logo, business name, and brand colors can immediately capture attention. Start by designing a logo that is simple, readable, and reflects the style of your products. Consider using a banner or large printed sign at the back of your booth to ensure visibility from a distance.
Materials for branding include vinyl banners, canvas prints, acrylic signs, or wooden boards. For an artisanal look, hand-painted signs on wood can add character. Place your sign at eye level or slightly above to maximize visibility. Consistency is key: match your table coverings, price tags, and business cards to your brand colors and design.
Preparation involves measuring your booth space and planning where signs will go without blocking products. Test your display before the event to ensure it is readable from various distances. Strong branding builds trust, makes your booth look professional, and helps visitors remember your products after the fair.
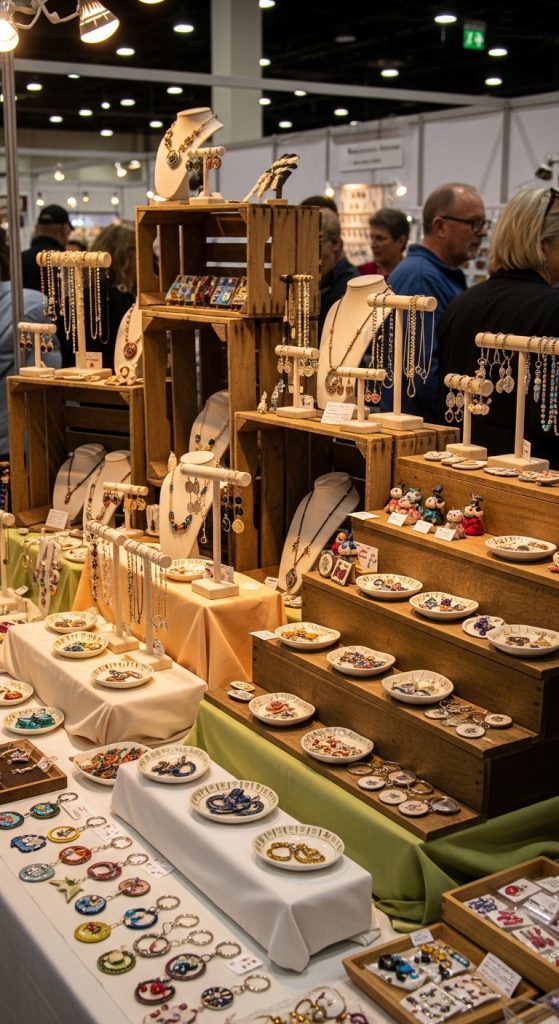
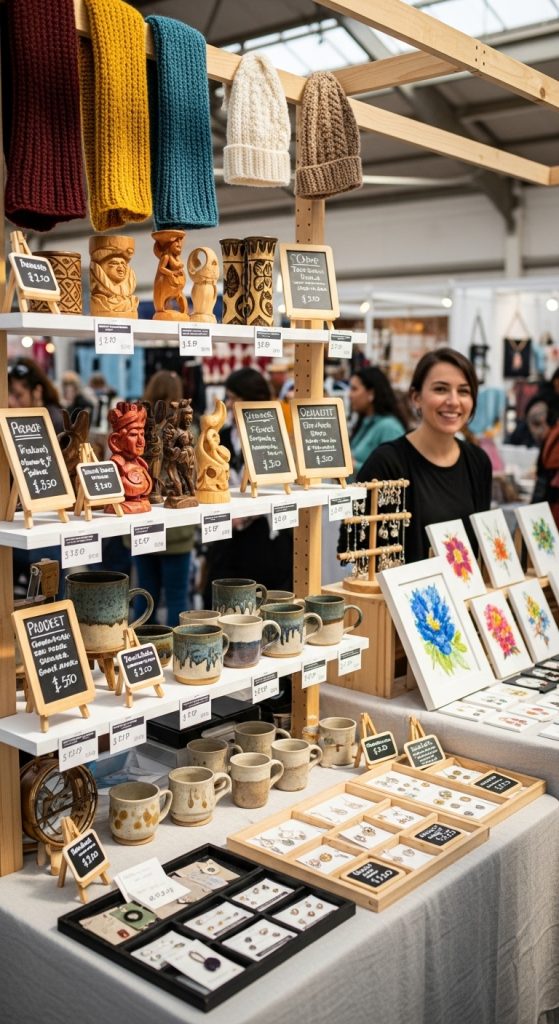
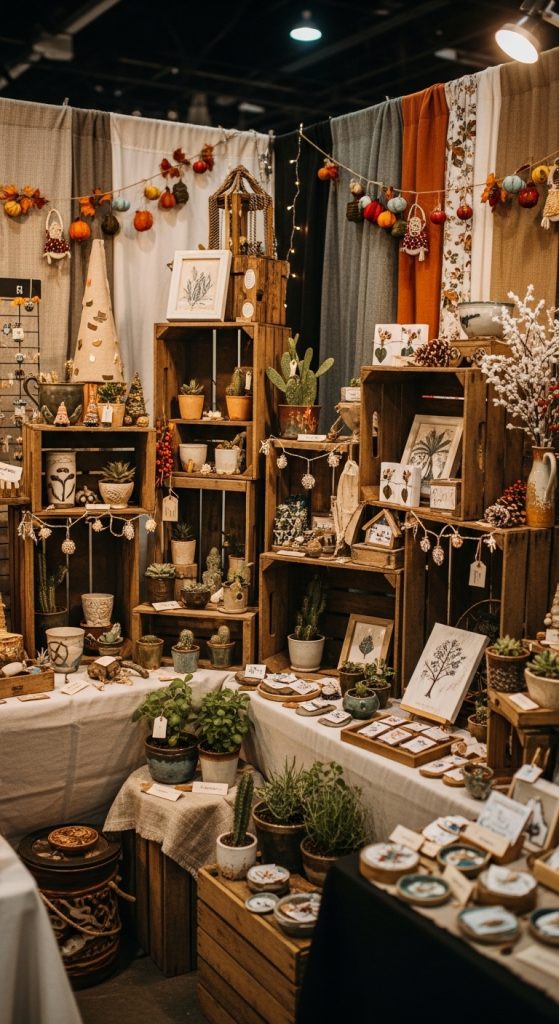
2. Multi-Level Display for Visual Appeal
Flat tables can make products look crowded and uninteresting. A multi-level display adds depth, making it easier for customers to see and interact with your items. Use different heights to highlight featured products or best sellers while keeping smaller items accessible.
Preparation includes sketching your booth layout and planning which products go on which levels. Materials for creating height include wooden crates, tiered shelves, stackable boxes, cake stands, or small ladders. Cover boxes with fabric or tablecloths to hide plain surfaces and keep a cohesive look.
Arrange products thoughtfully, keeping best sellers or eye-catching items at the center or higher levels. Ensure displays are stable and secure with non-slip mats or tape. Multi-level displays not only attract attention but also make your booth look professional and organized, encouraging customers to browse longer and increasing the chance of multiple purchases.
3. Clear Pricing and Product Information
One of the most important details in any booth is visible and readable pricing. Customers often hesitate to ask for prices, so clear labeling removes hesitation and speeds up sales.
Preparation starts with deciding your prices and creating labels in advance. Use readable fonts and avoid tiny handwriting. Materials for labels include printed cardstock, small frames, clip stands, chalkboards, or kraft paper tags. Outdoor fairs may require waterproof or laminated labels to protect them from weather.
Position your price tags in front of product groups or attach them directly to items. Consider including brief product descriptions, materials used, or care instructions for handmade items. Clear pricing and information demonstrate professionalism, improve customer experience, and make it easier for buyers to make purchasing decisions.
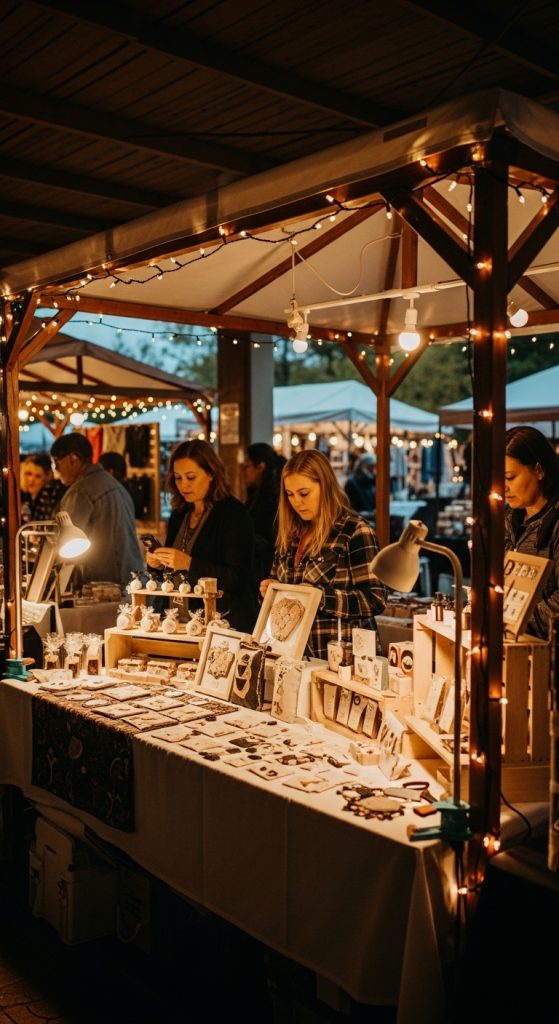
4. Effective Lighting for Indoor and Outdoor Fairs
Lighting can dramatically affect the appeal of your booth and products. Bright, well-positioned lights highlight details, colors, and textures that might be overlooked in poor lighting conditions.
Preparation involves assessing the lighting at the event location. Indoor fairs may allow electrical outlets, while outdoor markets may require battery-powered LED lights or solar lamps. Materials include clamp lights, string lights, LED panels, or spotlights. Use soft white bulbs to provide even lighting without harsh shadows.
Place lights strategically to illuminate the back and front of the booth, especially on featured products. Avoid glare or shadows that make it hard to see items. Lighting can also create a warm and inviting atmosphere that draws visitors into your booth. Properly lit displays make products look more appealing and professional, increasing the chance of sales.
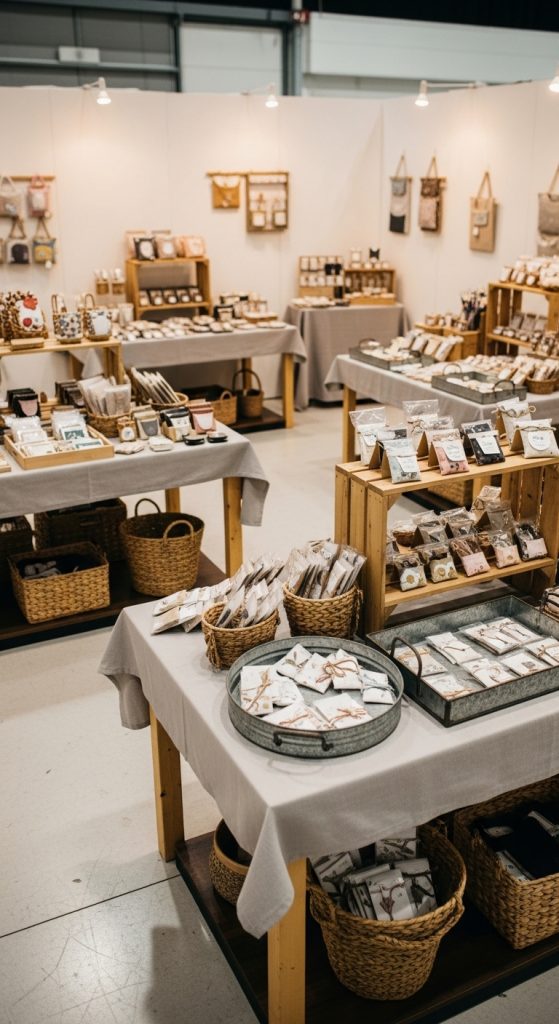
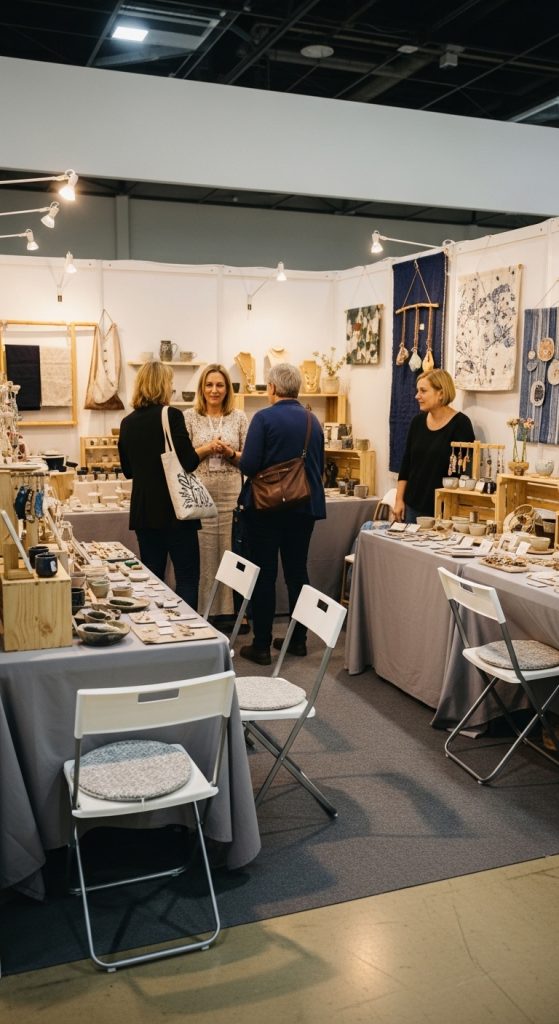
5. Organized and Accessible Layout
The layout of your booth influences how customers move and interact with your products. A cluttered table can feel overwhelming, while a well-organized space encourages exploration and browsing.
Preparation includes planning pathways and grouping products logically. Place frequently touched items in the front and fragile pieces toward the back or edges. Use separate zones for different product categories, such as jewelry, textiles, or home decor, to avoid confusion.
Materials to help organize include baskets, trays, small shelving units, and display boards. Leave enough space for customers to move comfortably, and avoid overcrowding tables. Accessible displays encourage interaction and allow buyers to examine items without assistance, creating a smoother shopping experience and boosting sales potential.
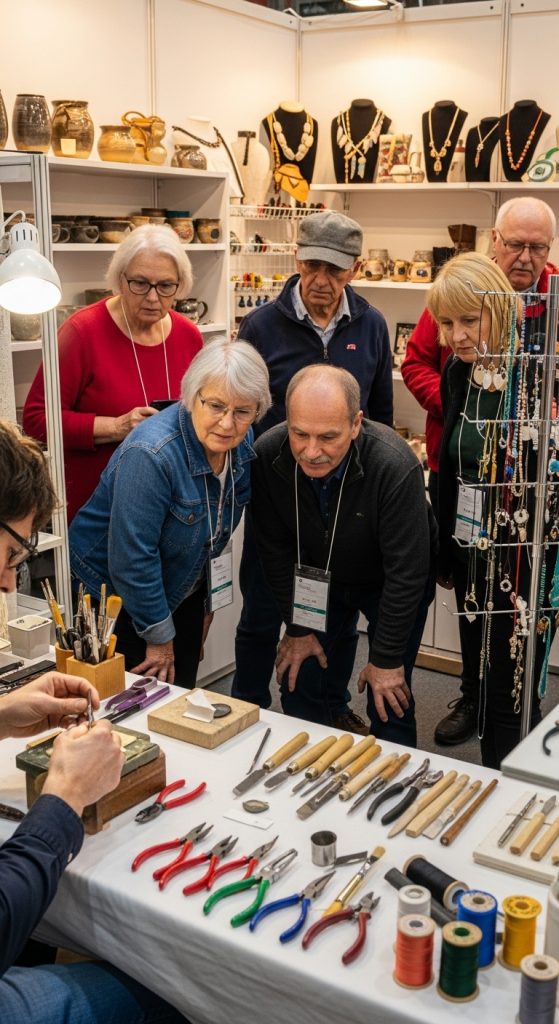
6. Interactive or Demonstration Space
Having a small area in your booth for demonstrations can engage visitors and create interest. Showing how a product is made, assembled, or used adds value and attracts attention.
Preparation requires identifying which items can be demonstrated safely. Materials may include your crafting tools, extra sample items, or a small table or easel for demonstrations. Ensure the area is safe and does not block customer flow.
Interact with visitors by explaining your process, telling the story behind your products, or inviting them to try simple techniques. This creates a memorable experience and encourages purchases. Demonstrations also position you as an expert and increase engagement, making your booth stand out among others.
7. Use of Props and Themed Decor
Props and decor can enhance the atmosphere of your booth and create a cohesive theme. Matching your displays to a visual story makes the booth memorable and visually attractive.
Preparation involves selecting props that complement your products without overwhelming them. Materials may include vintage crates, small plants, seasonal decorations, fabric backdrops, or decorative trays. Maintain consistency in color, style, and theme.
Arrange props to highlight products and guide customer attention. For example, use a rustic wooden crate to elevate handmade soaps or a small basket to showcase jewelry. Thoughtful props make your booth visually appealing, reinforce your brand style, and help customers connect emotionally with your products.
8. Comfortable Customer Interaction Space
Even at a craft fair, creating space for customer interaction improves experience and sales. Visitors need room to browse, ask questions, or handle products without feeling cramped.
Preparation includes evaluating your table placement and allowing pathways. If possible, leave space in front of your table and between display areas. Materials may include folding chairs for you or small stools for customers, ensuring comfort without cluttering the booth.
Position your checkout area strategically, so it is easy for customers to find and for you to manage transactions. A clear and comfortable layout encourages longer browsing time, positive interactions, and increased likelihood of purchase. Customer comfort is an often-overlooked factor in booth success.
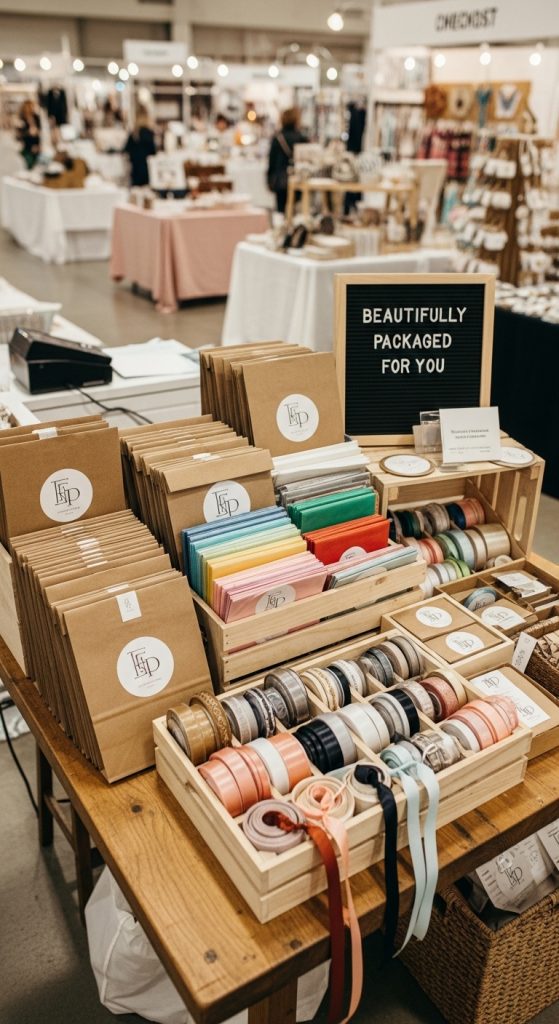
9. Easy-to-Handle Packaging and Bags
Providing attractive and practical packaging adds convenience for customers and enhances the shopping experience. Pre-packaged or ready-to-use bags can encourage impulse purchases.
Preparation includes sourcing bags, boxes, or wrapping materials that fit your products. Materials may include paper bags, tissue paper, ribbons, stickers, or small boxes. Branding packaging with your logo adds a professional touch.
Organize your packaging near the checkout area for quick access. Offer gift wrapping or bundle options to increase appeal. Easy and attractive packaging makes customers feel valued, protects products during transport, and leaves a lasting impression that encourages repeat business.
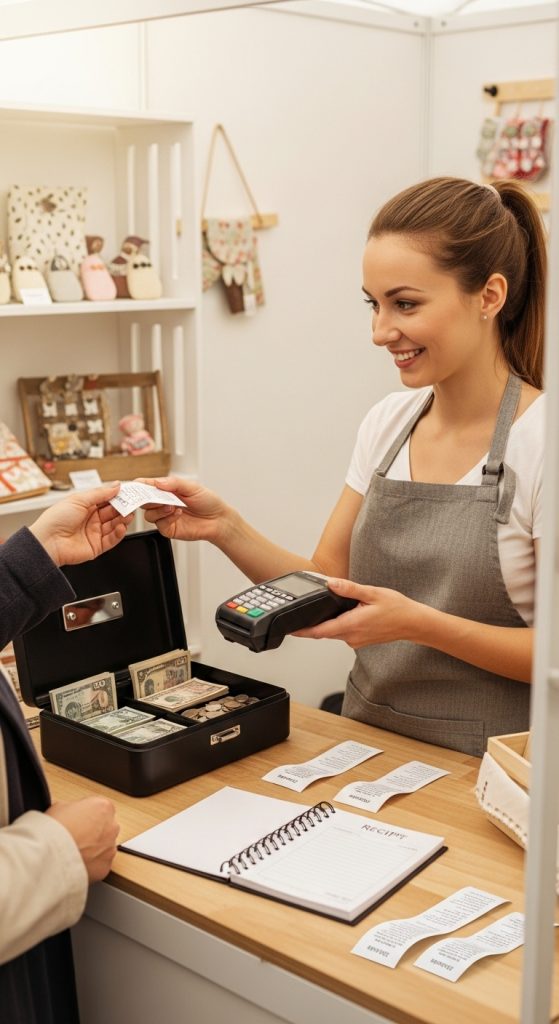
10. Efficient Checkout and Payment System
A smooth checkout process is crucial for a positive customer experience. Complicated or slow payment methods can frustrate buyers and reduce sales.
Preparation involves choosing a reliable payment system. Materials include a cash box, tablet or phone for card payments, receipt books, and secure storage for money. Mobile card readers or apps like Square, PayPal, or Stripe allow flexible payments.
Position the checkout area to minimize congestion. Keep all necessary supplies organized and within reach. Train any helpers on how to process transactions efficiently. An efficient checkout not only speeds up sales but also reinforces professionalism, leaving customers with a positive impression of your brand.