
10 Wall Art Arrangement
Creating the perfect wall art arrangement is one of the easiest ways to refresh a room, add personality, and establish a cohesive interior style. Whether you enjoy photography, paintings, minimal line art, or a mix of decorative elements, even a blank wall can be turned into a visually appealing focal point with thoughtful planning. Successful wall art arrangements depend on selecting the right pieces, understanding how sizes and shapes interact, and arranging them in a balanced, intentional layout. Before you start hanging anything, it is important to gather the right tools and identify the style you want to achieve. This helps prevent mistakes, unnecessary damage to the walls, and cluttered displays.
This guide explores ten unique wall art arrangement ideas, each explained with preparation steps, material recommendations, and techniques for flawless installation. From grid layouts to floating shelves, each idea offers inspiration for designing a polished and functional wall composition. Whether you are decorating a living room, bedroom, home office, or hallway, these creative arrangements will help you achieve a professionally styled look.

1. The Classic Grid Layout
A grid layout is one of the most timeless and balanced ways to arrange wall art. This design consists of evenly spaced frames aligned vertically and horizontally to form a clean geometric pattern. It suits minimalist interiors, modern apartments, and any space where symmetry feels appropriate. When selecting pieces for a grid, choose artwork of the same size to maintain uniformity. Photographs, typography prints, or abstract artwork work especially well in this arrangement.
To prepare, gather a measuring tape, painter tape, a level, nails or adhesive hooks, and identical frames. Start by deciding how many rows and columns you want. Four, six, or nine pieces are common choices. Lay the frames on the floor first to visualize the arrangement and adjust spacing before mounting. Mark the wall lightly with pencil or painter tape to ensure straight lines. Maintain consistent spacing between frames, usually between one to three inches depending on the size of the wall. Hang the frames starting from the center outward to keep the grid aligned.
A grid layout creates visual order while still allowing for creativity through the artwork itself. It is ideal for gallery walls where you want structure without overwhelming the space. This arrangement also works beautifully above sofas, beds, or dining room buffets.

2. The Asymmetrical Gallery Wall
An asymmetrical gallery wall is a dynamic and artistic approach for those who enjoy a more eclectic and personalized style. Unlike a grid layout, this arrangement does not require equal frame sizes or perfect alignment. Instead, it combines a variety of artworks, photos, illustrations, and decorative elements in different shapes and dimensions. This approach allows you to build a story or theme unique to your home.
To prepare, gather a diverse selection of frames and wall decor items such as mirrors, plaques, or small shelves. Use paper templates cut in the exact size of each piece to plan the layout on the wall before hanging anything. This prevents unnecessary holes and helps you visualize balance. Focus on creating equilibrium rather than symmetry. The arrangement should feel natural but not chaotic. Start with the largest piece as the anchor point, then build outward by placing medium and smaller pieces around it. Leave consistent spacing between items to maintain cohesion.
This style works well in living rooms, hallways, and staircases. It provides flexibility because you can continue adding pieces over time. It also reflects personal taste, making the space feel curated and meaningful rather than staged.

3. The Vertical Column Arrangement
A vertical column arrangement focuses on stacking multiple pieces of wall art in a tall, narrow line. This style is both space saving and elegant, ideal for areas with limited horizontal space such as corners, entryways, or the side walls of doors and windows. Vertical arrangements also draw the eye upward, making ceilings appear higher and enhancing the sense of height in a room.
To prepare, gather two to five pieces of artwork that share a similar theme or complementary colors. Frames should either match or coordinate for a refined look. Use a measuring tape and level to ensure proper alignment. Before hanging, lay the pieces on the floor to determine spacing. Leaving two to three inches between frames creates balance. Mark the wall lightly using painter tape to guide placement and ensure everything is centered vertically.
This arrangement is excellent for long hallways or alongside large furniture like bookcases. It works well with botanical prints, black and white photography, or minimalist artwork. A vertical column arrangement offers a neat and polished visuals without overwhelming the wall. It is also simple to adjust or swap pieces, making it a versatile option for evolving decor styles.

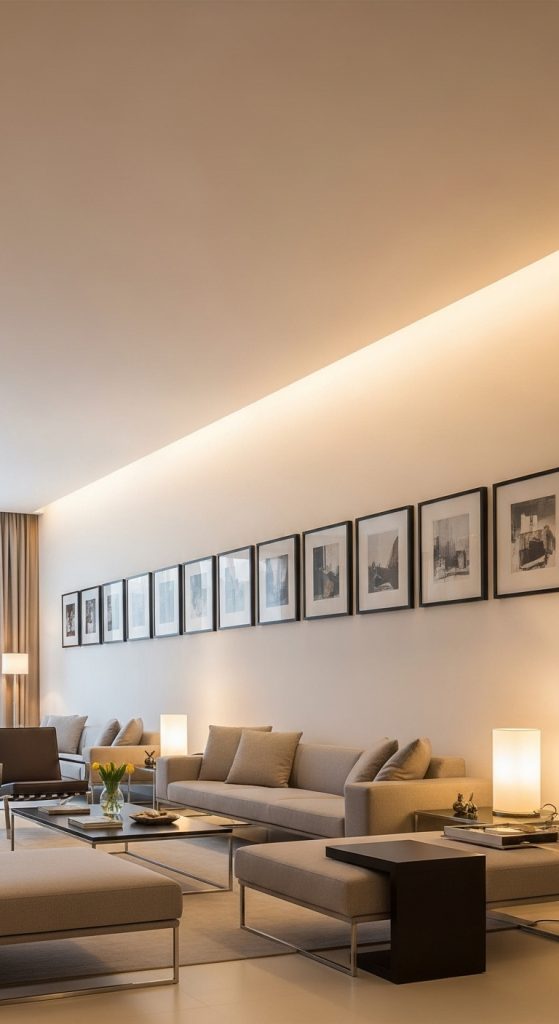
4. The Horizontal Linear Arrangement
A horizontal linear arrangement features artwork displayed in a long row across the wall. This style creates a sense of width and stability and is ideal for large rooms or expansive walls. It offers a clean, modern look and works well in living rooms, dining areas, and behind long pieces of furniture such as consoles or sofas.
To prepare, choose frames of either matching sizes or a combination of two or three sizes that align well along a horizontal line. Use a level, measuring tape, and painter tape to create a straight guide across the wall. This line helps ensure all frames sit at the same height. Depending on the length of the wall, you may use three, four, or even five frames.
Lay out the arrangement on the floor first to assess the order and spacing. Once satisfied, transfer the plan onto the wall using marked guidelines. Consistent spacing is key for this arrangement to look intentional and sleek. Artwork can range from landscape photography to abstract prints or even a series of themed sketches.
A horizontal linear arrangement contributes to a calm and organized atmosphere. It also helps visually anchor long furniture pieces and makes the room feel more cohesive and thoughtfully designed.
5. The Mixed Media Wall Arrangement
A mixed media arrangement blends different types of wall pieces such as framed art, woven hangings, clocks, metal sculptures, or wooden signs. This approach creates a layered, textured, and artistic display that works well in creative or bohemian styled interiors. It is ideal for anyone who wants to experiment beyond traditional framed prints.
To prepare, gather a varied selection of items in coordinating colors or styles. Include at least one large anchor piece to prevent the display from looking scattered. Before hanging, trace each item on paper and cut out templates. Tape these templates to the wall to visualize balance and spacing.
Mixing textures is key. Combine elements like macrame hangings, paintings, and small shelves to create depth. Maintain harmony by sticking to a common color palette or theme. When placing items, keep heavier or larger pieces toward the center or bottom and lighter objects toward the top to prevent visual imbalance.
This arrangement brings personality and dimension to any room. It works well above beds, in living rooms, or and creative studio spaces. A mixed media wall also provides endless possibilities, allowing you to adjust or replace pieces easily as your style evolves.

6. The Picture Ledge Display
Picture ledges offer a flexible and stylish way to display artwork without permanent installation. These shallow shelves allow you to lean multiple pieces of art, making it easy to rotate seasonal prints or frequently update the display. This arrangement is ideal for renters or anyone who prefers minimal wall damage.
To prepare, purchase picture ledges that match the room’s decor. They come in various lengths and finishes, such as wood or painted styles. Install the ledges using screws and anchors suited to your wall type. Use a level to ensure they sit straight.
Once installed, gather a selection of framed artwork, books, small plants, or decorative items. Start by placing the largest pieces at the back, leaning them against the wall. Layer smaller items in front, creating a multi dimensional display. Avoid overcrowding the ledge. Leave enough room for each piece to stand out.
Picture ledges are perfect for bedrooms, offices, and living rooms. They create a curated, magazine styled look and allow you to rearrange items whenever you wish. This arrangement offers practicality, style, and versatility in a simple and affordable way.

7. The Large Statement Piece Arrangement
A single oversized artwork can create a bold and dramatic focal point in any room. This arrangement is ideal for minimalists or those who prefer simplicity over a collection of smaller pieces. A large statement piece works especially well above sofas, beds, mantels, or on otherwise empty walls needing visual impact.
To prepare, measure the wall to determine the appropriate size for the artwork. A general rule is that the piece should cover around two thirds of the furniture width beneath it. Choose artwork that reflects your interior theme, whether abstract, photographic, or illustrative.
Before hanging, gather tools including a level, tape measure, and suitable wall anchors. Heavy pieces often require stronger hardware or support. Mark the wall where the top of the frame should sit and ensure it aligns with eye level.
A large statement piece simplifies decorating by reducing the need for multiple frames while still delivering a strong aesthetic. It brings cohesion to the room and allows the artwork to shine as the centerpiece. This approach is ideal for modern and contemporary interiors and is easy to maintain and refresh when needed.

8. The Mirror and Art Combination
Combining mirrors with artwork is a refined and unique way to create a visually engaging wall arrangement. Mirrors add dimension, light, and a sense of openness to the room, while artwork provides personality and color. This arrangement is ideal for small spaces or dimly lit areas where additional brightness and reflection are beneficial.
To prepare, choose one or two mirrors with complementary frames and a selection of artwork that matches the theme. Place the mirror either at the center or slightly off center depending on your design vision. Use paper templates to map out the arrangement on the wall.
When hanging, ensure the mirror is securely installed using anchors appropriate for its weight. Surround it with smaller pieces of art, balancing the shapes and sizes. Maintain consistent spacing and avoid placing too many reflective surfaces together to prevent visual clutter.
This arrangement works beautifully in entryways, living rooms, and bedrooms. It enhances natural lighting while adding artistic charm. The combination of reflective and artistic elements creates a sophisticated, balanced look that feels both practical and stylish.

9. The Layered Overlapping Arrangement
A layered overlapping arrangement uses stacked or partially overlapping frames to create a bold and artistic statement. This modern technique breaks traditional decor rules and works well for contemporary or casual home styles. It is ideal for creative individuals who enjoy unconventional displays.
To prepare, select frames that vary slightly in size but maintain a cohesive color scheme. This helps prevent the arrangement from appearing messy. You can overlap pieces on floating shelves or lean artwork against one another on a picture ledge. If hanging on the wall, ensure the overlapping effect is intentional and not obstructive.
Plan the layout using templates or by arranging pieces on the floor. Place the largest frame at the back, allowing smaller pieces to partially cover its edges. Keep the artwork readable and aesthetically balanced. Avoid overlapping too many pieces, as this can create clutter.
This arrangement adds depth and visual interest to any room. It works especially well in studios, living rooms, or modern spaces where personality and artistic expression are priorities. It also offers flexibility for rearranging or swapping pieces as needed.

10. The Symmetrical Double Frame Arrangement
A symmetrical double frame arrangement features two identical or complementary artworks hung side by side. This simple yet elegant arrangement creates harmony and balance, making it ideal for bedrooms, dining rooms, or above minimal furniture. It feels polished and intentional without requiring many pieces.
To prepare, select two pieces of artwork that share a theme, color palette, or design style. Measure the wall and determine where the pair will be placed. Use a level and measuring tape to ensure both frames align perfectly in height and spacing. Typically, leaving two to four inches between the frames provides balance.
This arrangement suits both large and small walls depending on the scale of the pieces. It works well with nature prints, abstract artwork, line drawings, or architectural photography. The simplicity of the double frame layout offers visual calm and sophistication.
By using symmetry, this wall art arrangement creates a sense of order and refinement. It is easy to install, easy to maintain, and fits seamlessly into modern, classic, and transitional interiors.
