10 DIY Little Tabletop ideas
Creating small tabletop projects is one of the most enjoyable ways to bring creativity into your living space. These miniature builds demand fewer materials and offer quicker results compared to large scale projects. They allow you to experiment with style texture and design without committing to something that takes weeks to finish. Whether you want to enhance your desk brighten a coffee table or personalize a shelf display little tabletop ideas offer a fun range of possibilities. This blog post will explore ten detailed DIY ideas with each point explained in about two hundred words. You will also find preparation steps materials you may need and helpful insights for finishing your projects successfully.
Tabletop projects also offer an excellent starting point for beginners who want to practice crafting woodworking or decorative art. These small projects can introduce you to techniques like sanding painting gluing and assembling without overwhelming you. Many ideas also use recycled items which makes them budget friendly and environmentally responsible. With a bit of creativity you can repurpose leftover wood jars tiles paper and fabric into practical or decorative tabletop pieces.
In this guide you will find ideas suitable for different rooms and purposes. Some are purely decorative while others offer functionality. Each idea includes a description of how it improves your living space and why it stands out as a worthwhile project. You can choose one based on your preference style or material availability. The aim is to help you bring your tabletop to life through simple yet meaningful projects that anyone can create at home with patience and inspiration.
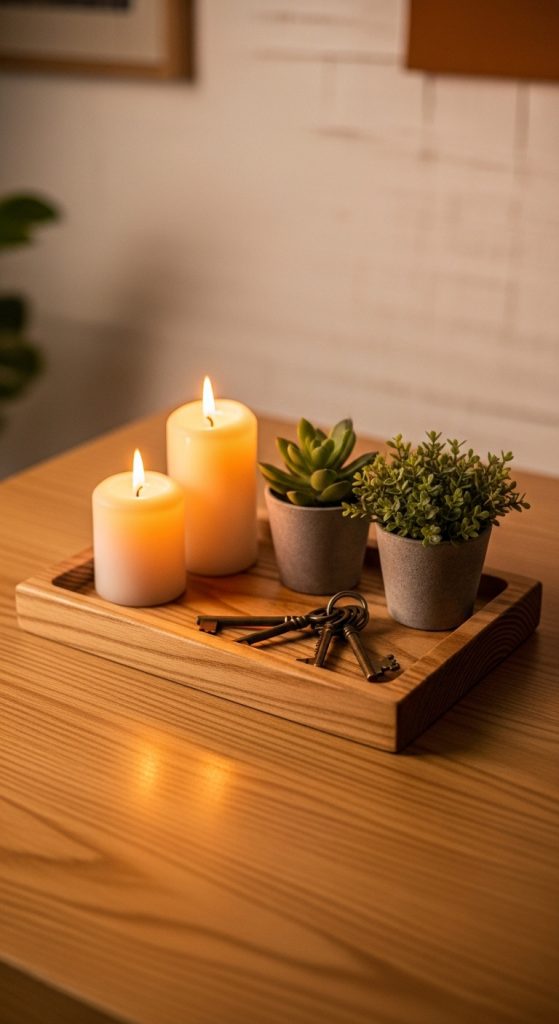
DIY Mini Wooden Tray
A mini wooden tray is a classic tabletop piece that adds style and usefulness to your space. It can hold keys candles small plants office supplies or snacks depending on where you place it. To make a mini tray you will need thin wood pieces sandpaper wood glue a small hand saw paint or stain and a brush if you want a finished look. Start by cutting the wood into one base piece and four narrow strips that act as the tray walls. Sand each piece well so the edges are smooth and comfortable to touch. Apply wood glue carefully along the edges and attach the walls to the base. Allow it to dry fully before moving to the next step.
Once the tray structure is solid you can paint or stain it according to your design preference. A stained tray works well for rustic or minimalist spaces. A painted tray looks great in modern bright or themed rooms. This small build is ideal for beginners because the measurements are flexible and it allows you to practice simple assembly. It also gives you a functional tabletop accessory that adds character to any corner of your home. You can use it on a desk console table nightstand or entryway for an instant touch of convenience and charm.
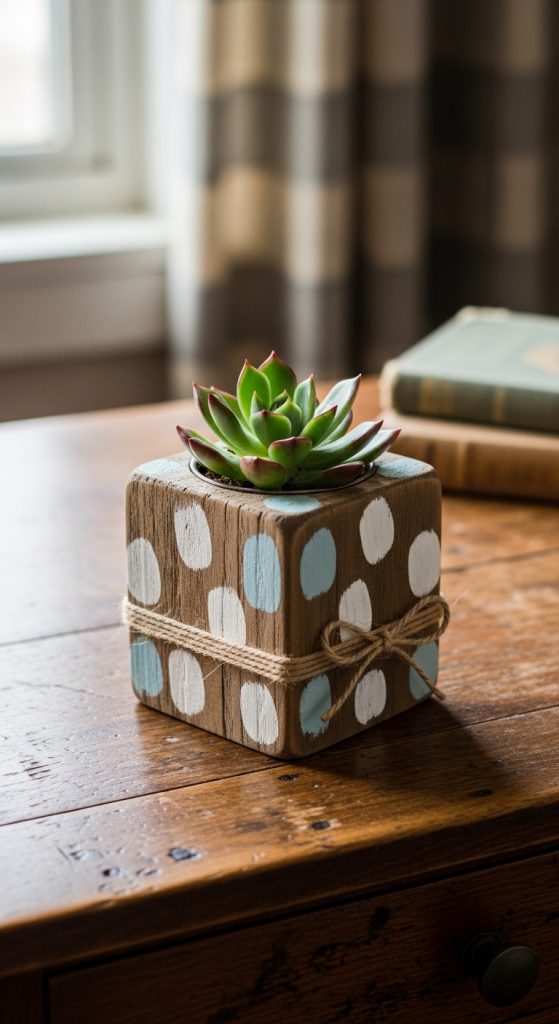
DIY Mini Plant Holder
A mini plant holder brings natural freshness to your tabletop area. Small plants such as succulents cacti baby ferns and miniature flowers thrive in tiny handmade containers. To create a simple plant holder you can use small wooden blocks old cups leftover jars tin cans or even pieces of cement depending on your preferred style. If you choose jars or cans make sure they are cleaned thoroughly. If working with wood prepare a small block or cube and hollow out the center using safe carving tools. Smooth the surface with sandpaper before using.
After selecting your container paint or decorate it with soft colors or textured patterns. You can wrap it in twine cover it in fabric or leave it plain for a natural look. Add small pebbles at the bottom for drainage then fill with soil and place your plant inside. This simple tabletop item makes your space feel lively and vibrant. It is also an excellent way to introduce greenery into small areas like a work desk or bedside table. A mini plant holder also makes a wonderful handmade gift since it combines nature and craftsmanship in a charming way. This project is quick simple and highly customizable for any interior style.
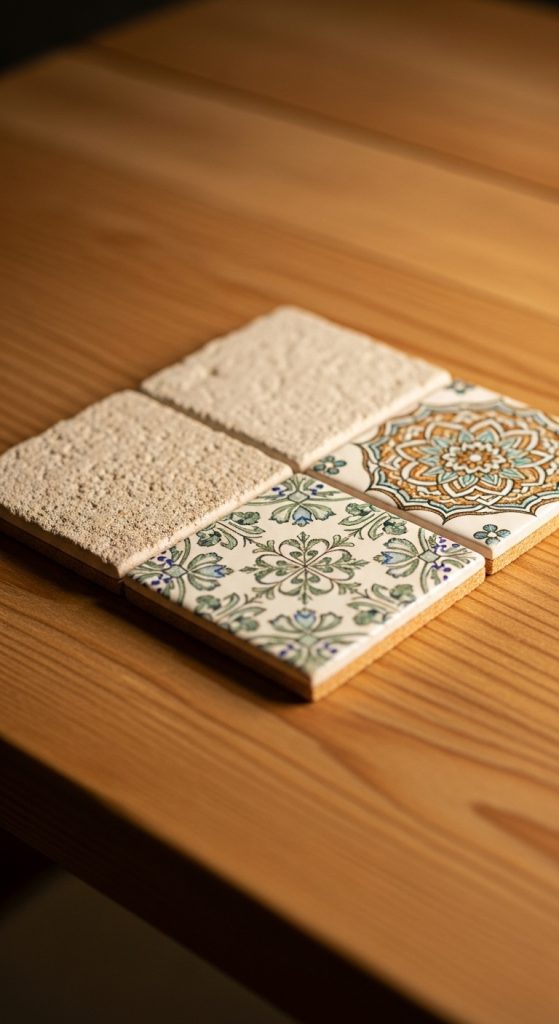
DIY Tile Coaster Set
Tile coasters are one of the most useful tabletop items because they protect surfaces from heat moisture and stains. Making a tile coaster set is simple and cost effective especially if you use leftover tiles from a renovation. You can also buy inexpensive ceramic marble or wooden tiles from craft stores. To begin choose four to six tiles suitable for your tabletop size. Clean them carefully and dry them thoroughly. Next decide whether you want to decorate them or keep them natural. Plain white or stone tiles look elegant while hand painted tiles make your set more personal.
If you want to decorate your coasters use acrylic paint, decoupage paper or printed designs. Cut your design to the exact size of the tile and glue it using a thin adhesive layer. Once dry seal the top with a clear coat to protect it from water and heat. Add felt pads or cork to the underside of each tile so your surface remains scratch free. A tile coaster set is a practical piece that adds a refined touch to your living room dining table or office desk. It is durable easy to clean and simple to redesign whenever you want a fresh look.
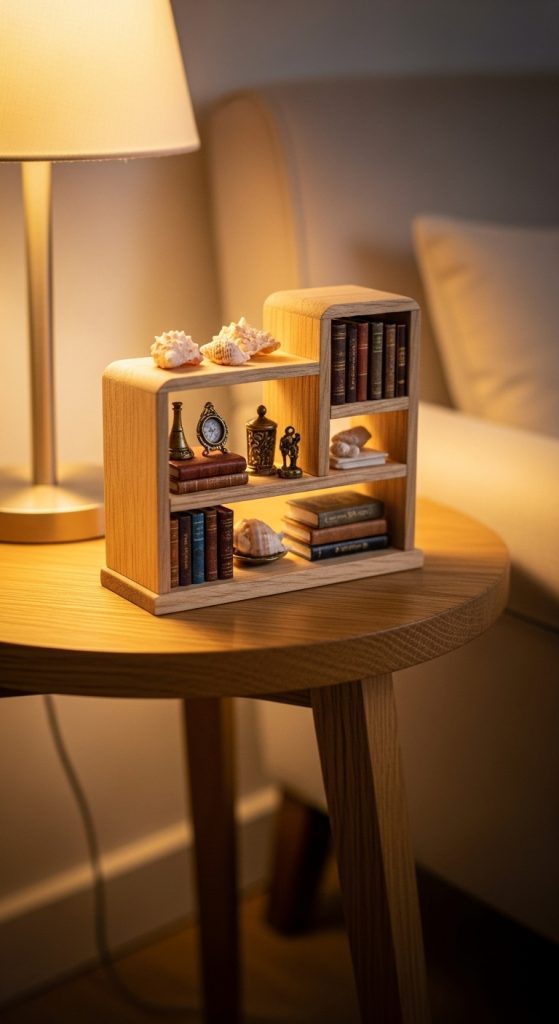
DIY Mini Bookshelf Decor Piece
Small decorative bookshelf pieces help enhance tabletops by adding personality and structure. A mini bookshelf decor piece can be made from small wooden blocks cardboard or layered foam boards. This project works especially well for those who enjoy literary themes or want to display miniature items. Start by cutting your base pieces into small rectangular shapes. Use wood glue or craft glue to assemble them into a tiny shelf structure with two or three levels. Sand the edges smoothly if using wood.
Once the structure is ready decorate it with paint stain or patterned paper. You can create a rustic shelf modern shelf or colorful shelf depending on the room. This tiny decor item fits well on coffee tables desks or side tables. You can display tiny books shells figurines or souvenirs on the small shelves. It also adds a storytelling element to your tabletop and makes the area feel intentional and curated. This project is simple enough for beginners and allows plenty of freedom in size and overall design. It also helps you organize small keepsakes in a stylish and attractive way.
DIY Pebble Candle Dish
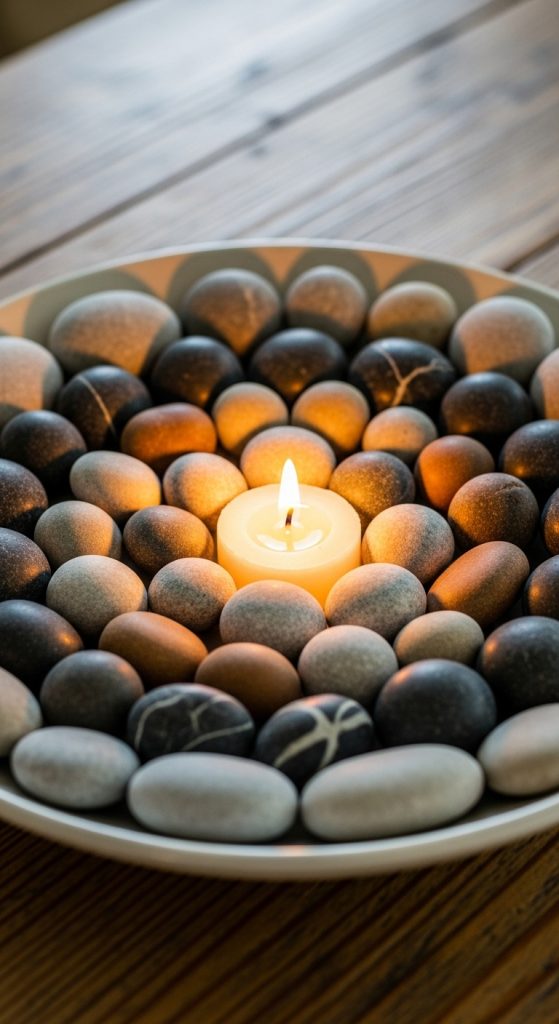
A pebble candle dish creates a natural and calming tabletop accent. It works well as a centerpiece or a soft decorative element for living rooms bedrooms or relaxation spaces. To begin choose a shallow dish wooden base or ceramic plate. Collect smooth pebbles of various sizes or purchase a small bag of decorative stones. Clean the stones and dry them. Place your dish on a flat surface and start arranging the pebbles around the edges leaving the center open for a small candle.
You can glue the pebbles in place or leave them loose for a more natural feel. If you prefer a structured design glue each pebble carefully to create a solid decorative ring. Choose a candle size that fits comfortably in the center. Once assembled your pebble candle dish adds warmth texture and an outdoor inspired charm to your tabletop. It is a relaxing project that requires no advanced skills and takes little time to complete. The soft glow of the candle combined with natural stone accents makes your space feel serene and inviting. This project also pairs well with spa themed or earthy interior styles.
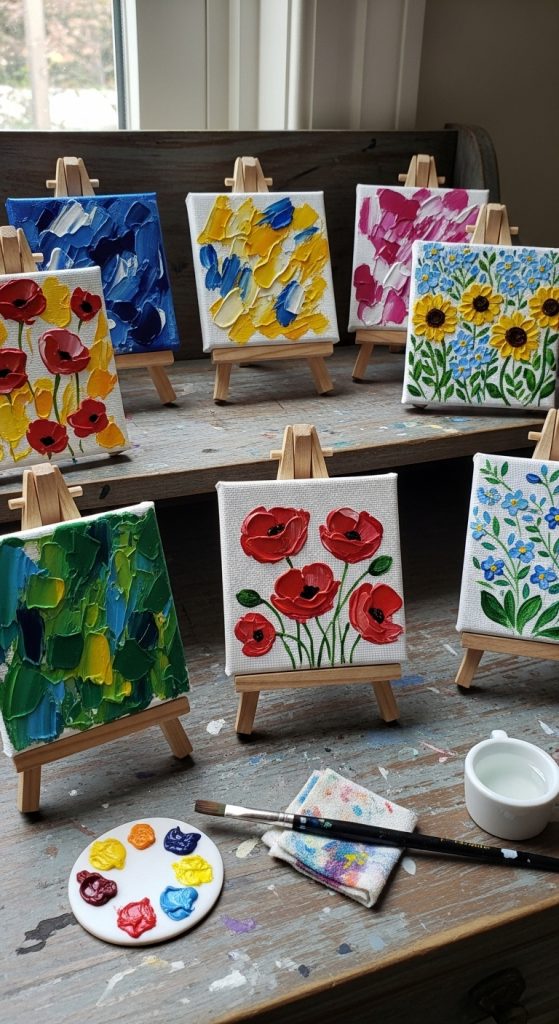
DIY Mini Art Canvas Display
Creating a mini art canvas display is a wonderful way to express creativity while decorating your tabletop. Small canvases are affordable and easy to paint. You can create single canvases or a set of three to form a cohesive display. Materials include canvas small wooden easels acrylic paints brushes and a protective finish. Begin by choosing a theme such as landscapes abstract patterns quotes or floral designs. Sketch your idea lightly then paint your artwork layer by layer.
Once the paintings are dry seal them with a clear coat if you want a glossier finish. Place them on mini easels and arrange them neatly on your desk or shelf. These tiny canvases add color and personality to your space. They are perfect for creating a visual focal point without taking up too much room. This project is also perfect for beginners wanting to practice painting techniques without pressure. You can update the artwork frequently to match seasons moods or interior changes. It also makes for an excellent handmade gift since it carries a personal touch that reflects your artistic style and effort.
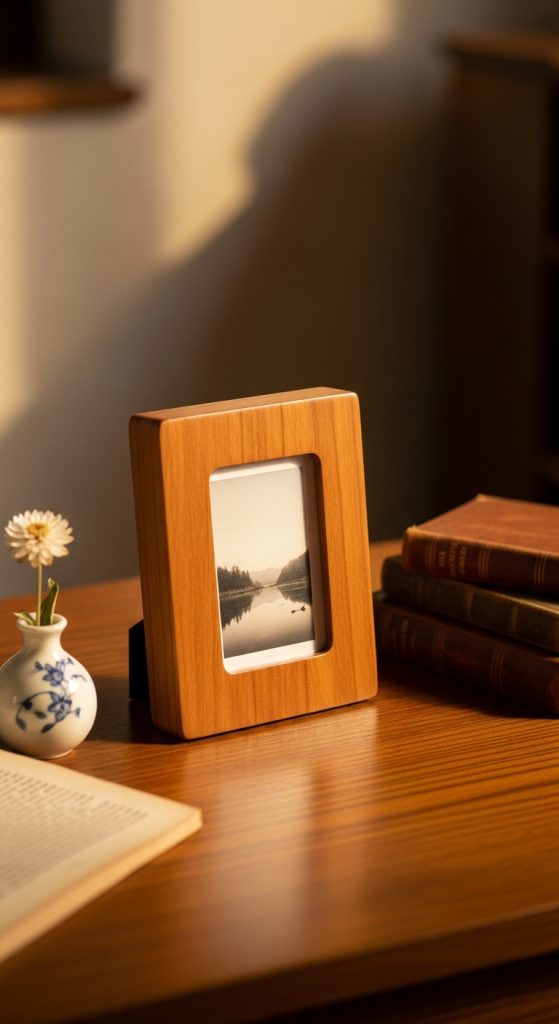
DIY Tabletop Photo Frame Block
A tabletop photo frame block displays memories beautifully while adding charm to small spaces. To make one you will need a wooden block sandpaper paint or stain and either printed photos or decorative patterns. Begin by sanding the block until the surface is smooth. Apply paint or stain depending on the style you want. Soft pastel paint offers a modern look while stained wood gives a warm classic feel.
Once the finish dries print a small photo that fits the block size. Attach it using craft glue or double sided tape. For added protection apply a light sealant layer over the photo. Some people also prefer using mini clips instead of glue so photos can be changed easily. This frame block sits well on desks shelves side tables or console tables. It provides a personal touch to your space by showcasing meaningful pictures such as family vacations celebrations or artistic photos. The project is simple quick and suitable for all crafting levels. It is also a unique alternative to traditional frames taking up less space while offering a more customized look.
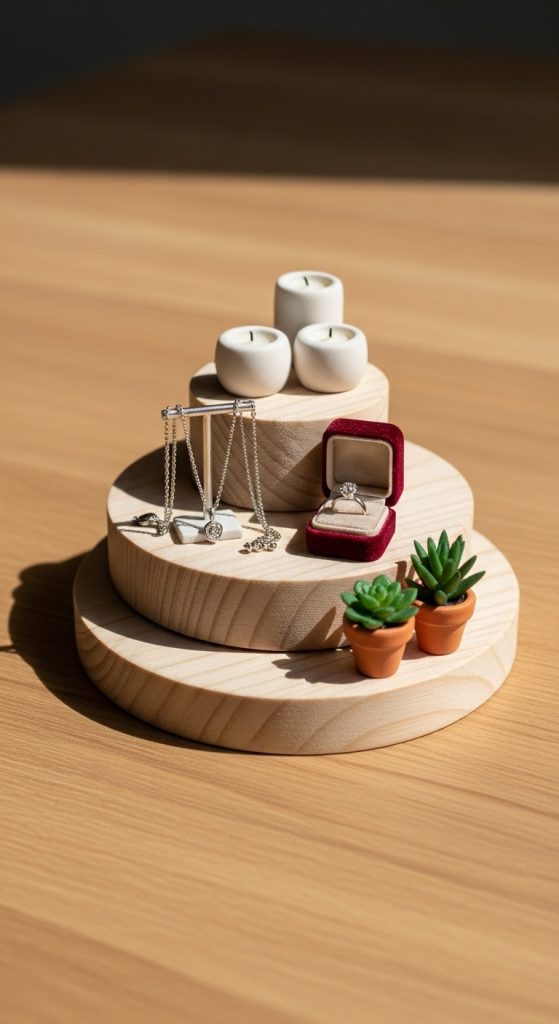
DIY Mini Tiered Display Stand
A mini tiered display stand works wonderfully for organizing and showcasing small items such as jewelry candles tiny plants or decor pieces. To create one use lightweight wood cardboard or even old plate sets. Start by cutting three circular or square pieces of different sizes. These will form the top middle and bottom tiers. Prepare two vertical supports using wooden dowels or cylindrical blocks. Sand all pieces until they are smooth and ready for assembly.
Glue the supports between the tiers and ensure everything is centered for balance. Allow the structure to dry completely. Once assembled paint it or leave it natural for a minimalist aesthetic. A tiered stand instantly elevates your tabletop by adding height variety and structure. It also lets you group items neatly and attractively which helps reduce clutter. This stand works especially well for dressing tables coffee tables and office desks. It is an excellent beginner project because the measurements are flexible and the structure is straightforward to build. You can finish it with varnish or clear coat for durability.
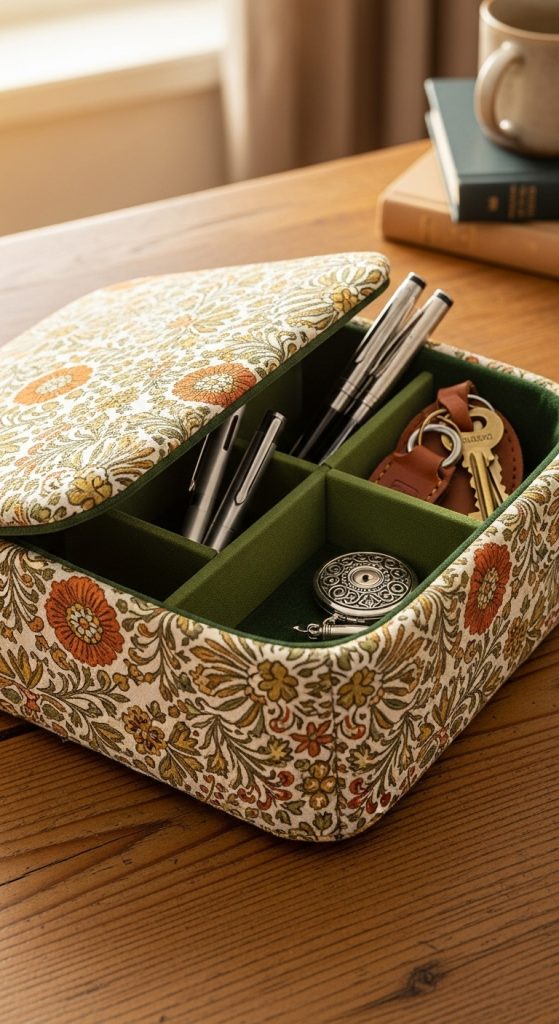
DIY Fabric Covered Storage Box
A fabric covered storage box adds both beauty and function to your tabletop. It helps organize items like pens cables keys stationery or small accessories while blending seamlessly into your room decor. To make one choose a small cardboard or wooden box along with fabric glue scissors and optional padding. Start by measuring the fabric so it covers each side of the box including the base. Cut the fabric neatly and apply glue evenly on each surface. Press the fabric in place and smooth out any wrinkles.
For a softer look you can insert a thin layer of foam or cotton padding beneath the fabric. You may also add decorative trims or labels for organization. A fabric covered box is easy to personalize with patterns such as stripes floral prints geometric shapes or neutral tones. It adds texture and charm to your tabletop while keeping small items arranged and out of sight. This project is ideal for anyone who enjoys simple sewing or crafting. It also offers a creative way to repurpose old fabric pieces that otherwise go unused.
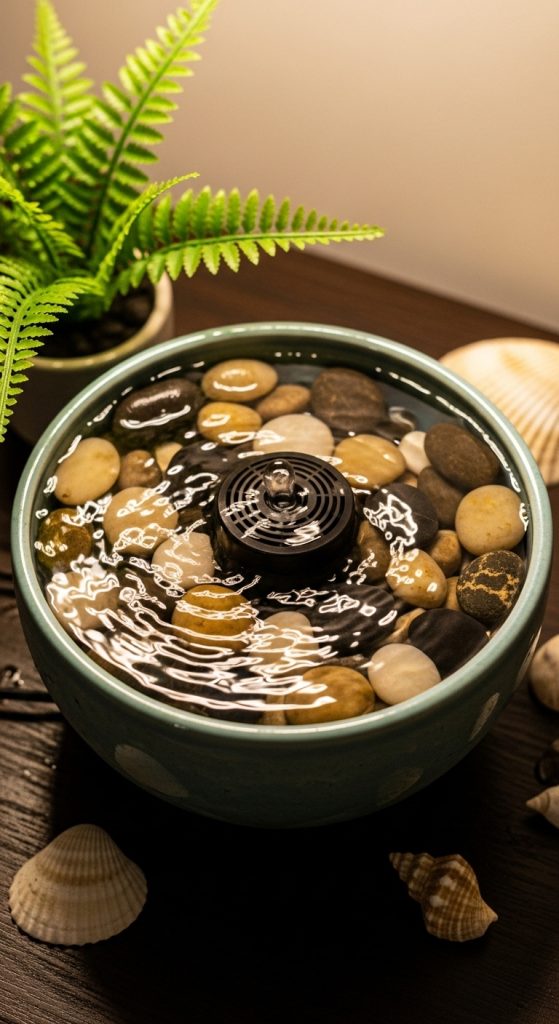
DIY Mini Tabletop Fountain
A tabletop fountain adds movement sound and tranquility to your space. Despite looking complex it can be created using simple materials such as a small bowl smooth stones a compact water pump and decorative elements like shells or artificial plants. Begin by selecting a sturdy bowl or container. Place the pump at the bottom and secure the tube so water flows gently over the stones. Arrange stones around the pump to hide it from view.
Fill the container with water making sure the pump is fully submerged. Turn it on and adjust the flow until you achieve a gentle trickling sound. You can also add decorative pieces to create a natural look. This mini fountain becomes an eye catching tabletop feature that promotes relaxation and reduces stress. It works well in living rooms offices and reading corners. The soft soothing sound enhances the atmosphere of any space. It is important to maintain the fountain by cleaning the pump occasionally and refilling water as needed. This project may require slightly more effort but the final result offers beauty and serenity that enrich your environment.